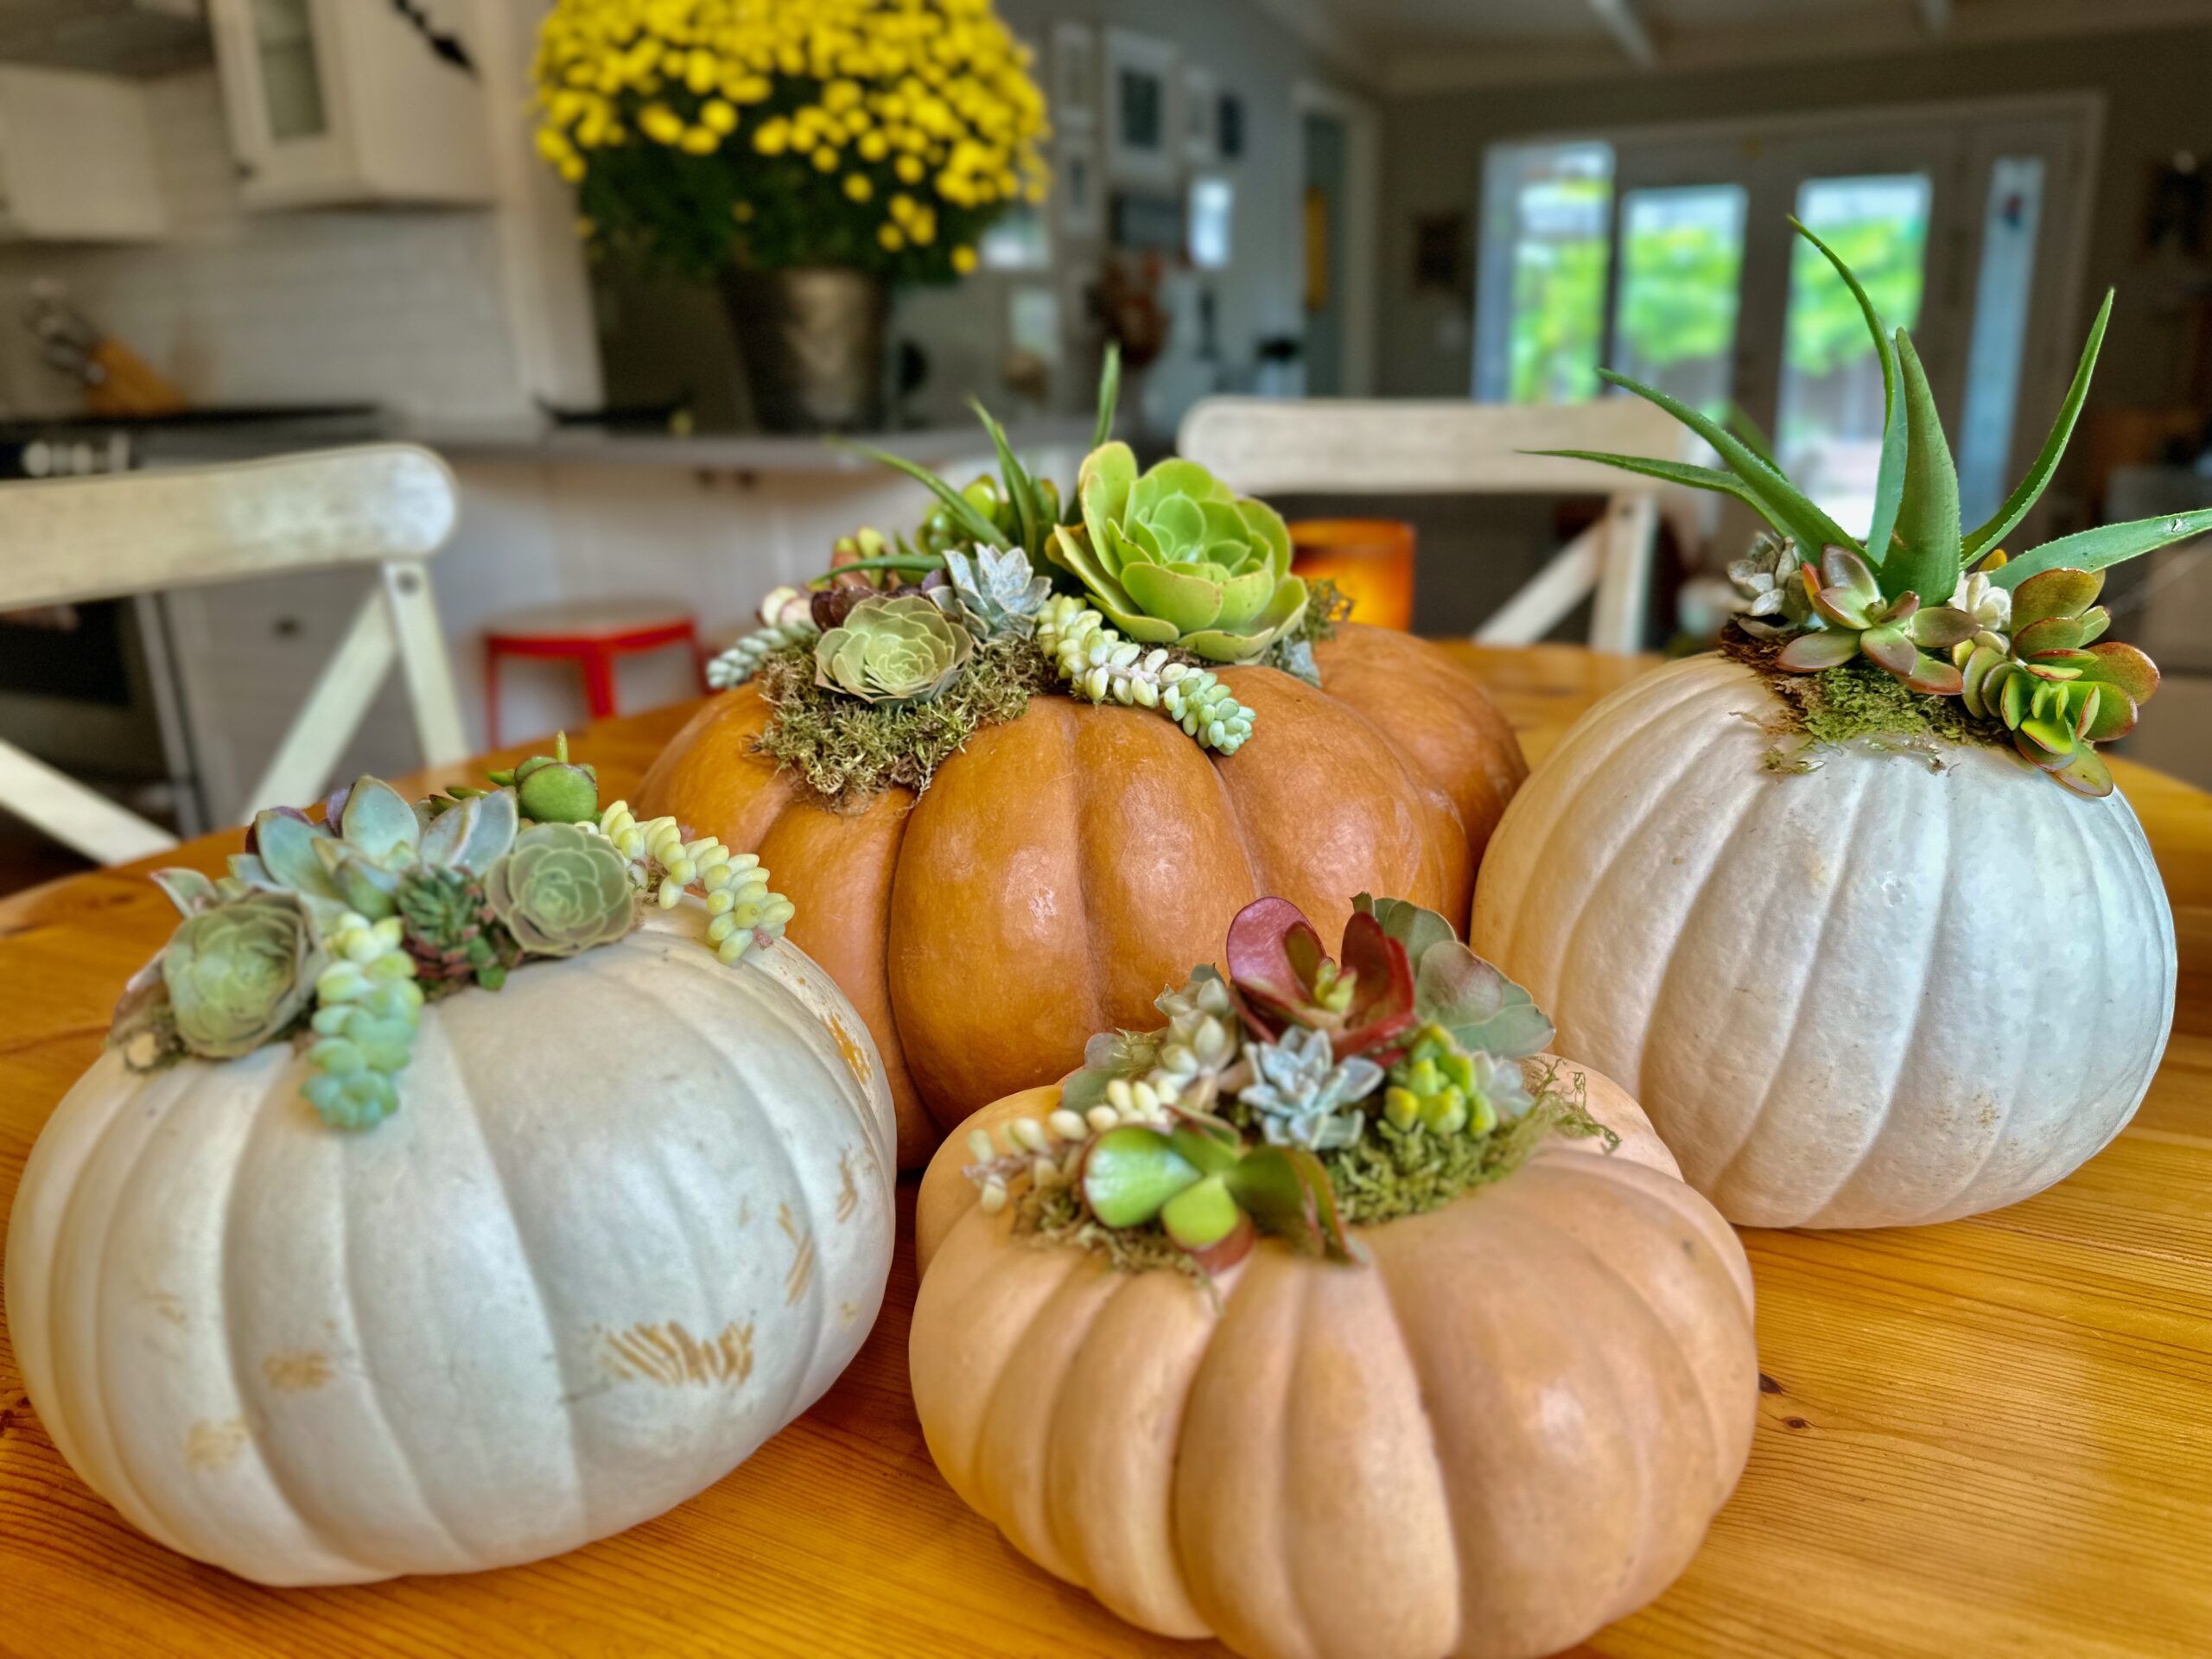
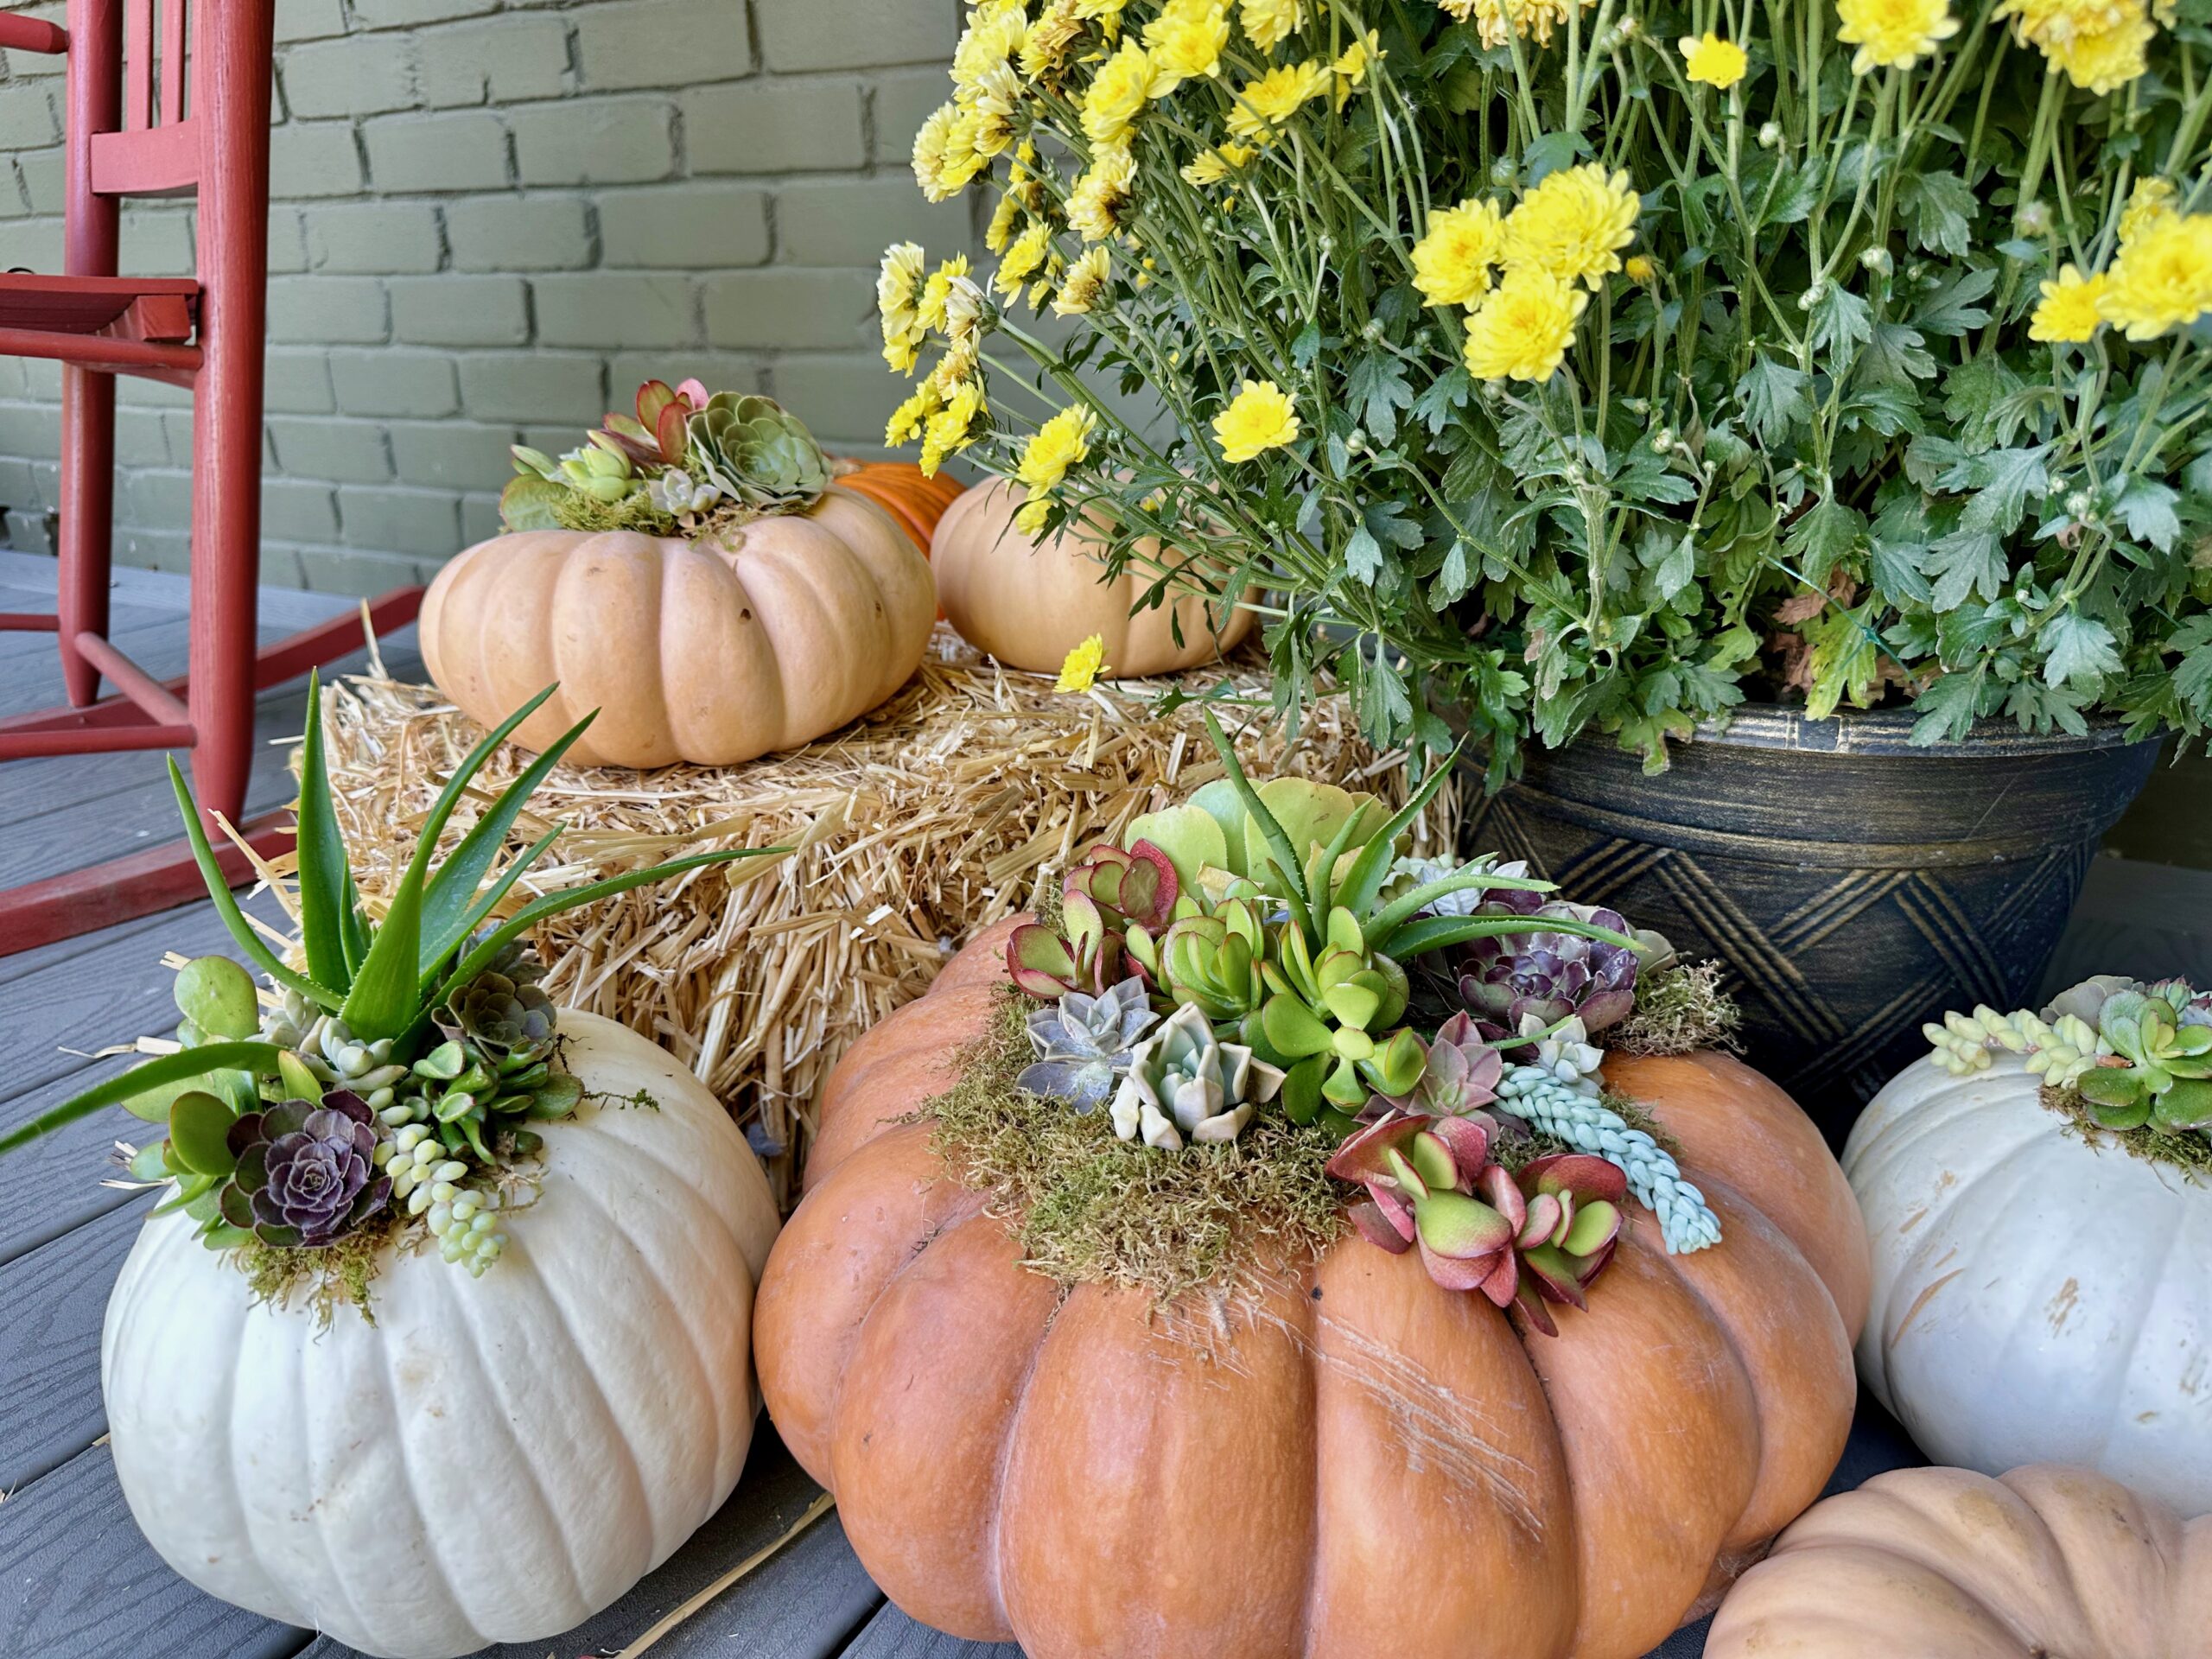
When I first heard about these easy succulent pumpkins, I knew I needed to try them. After all, I already had most of what I needed to make them close on hand. My yard and garden are full of succulents, and my daughter grew a small pumpkin patch this year. There was no reason not to try these succulent pumpkins. These pumpkins look beautiful as fall decorations and make gorgeous Thanksgiving centerpieces. Plus, these succulent pumpkins last and look great all season long.
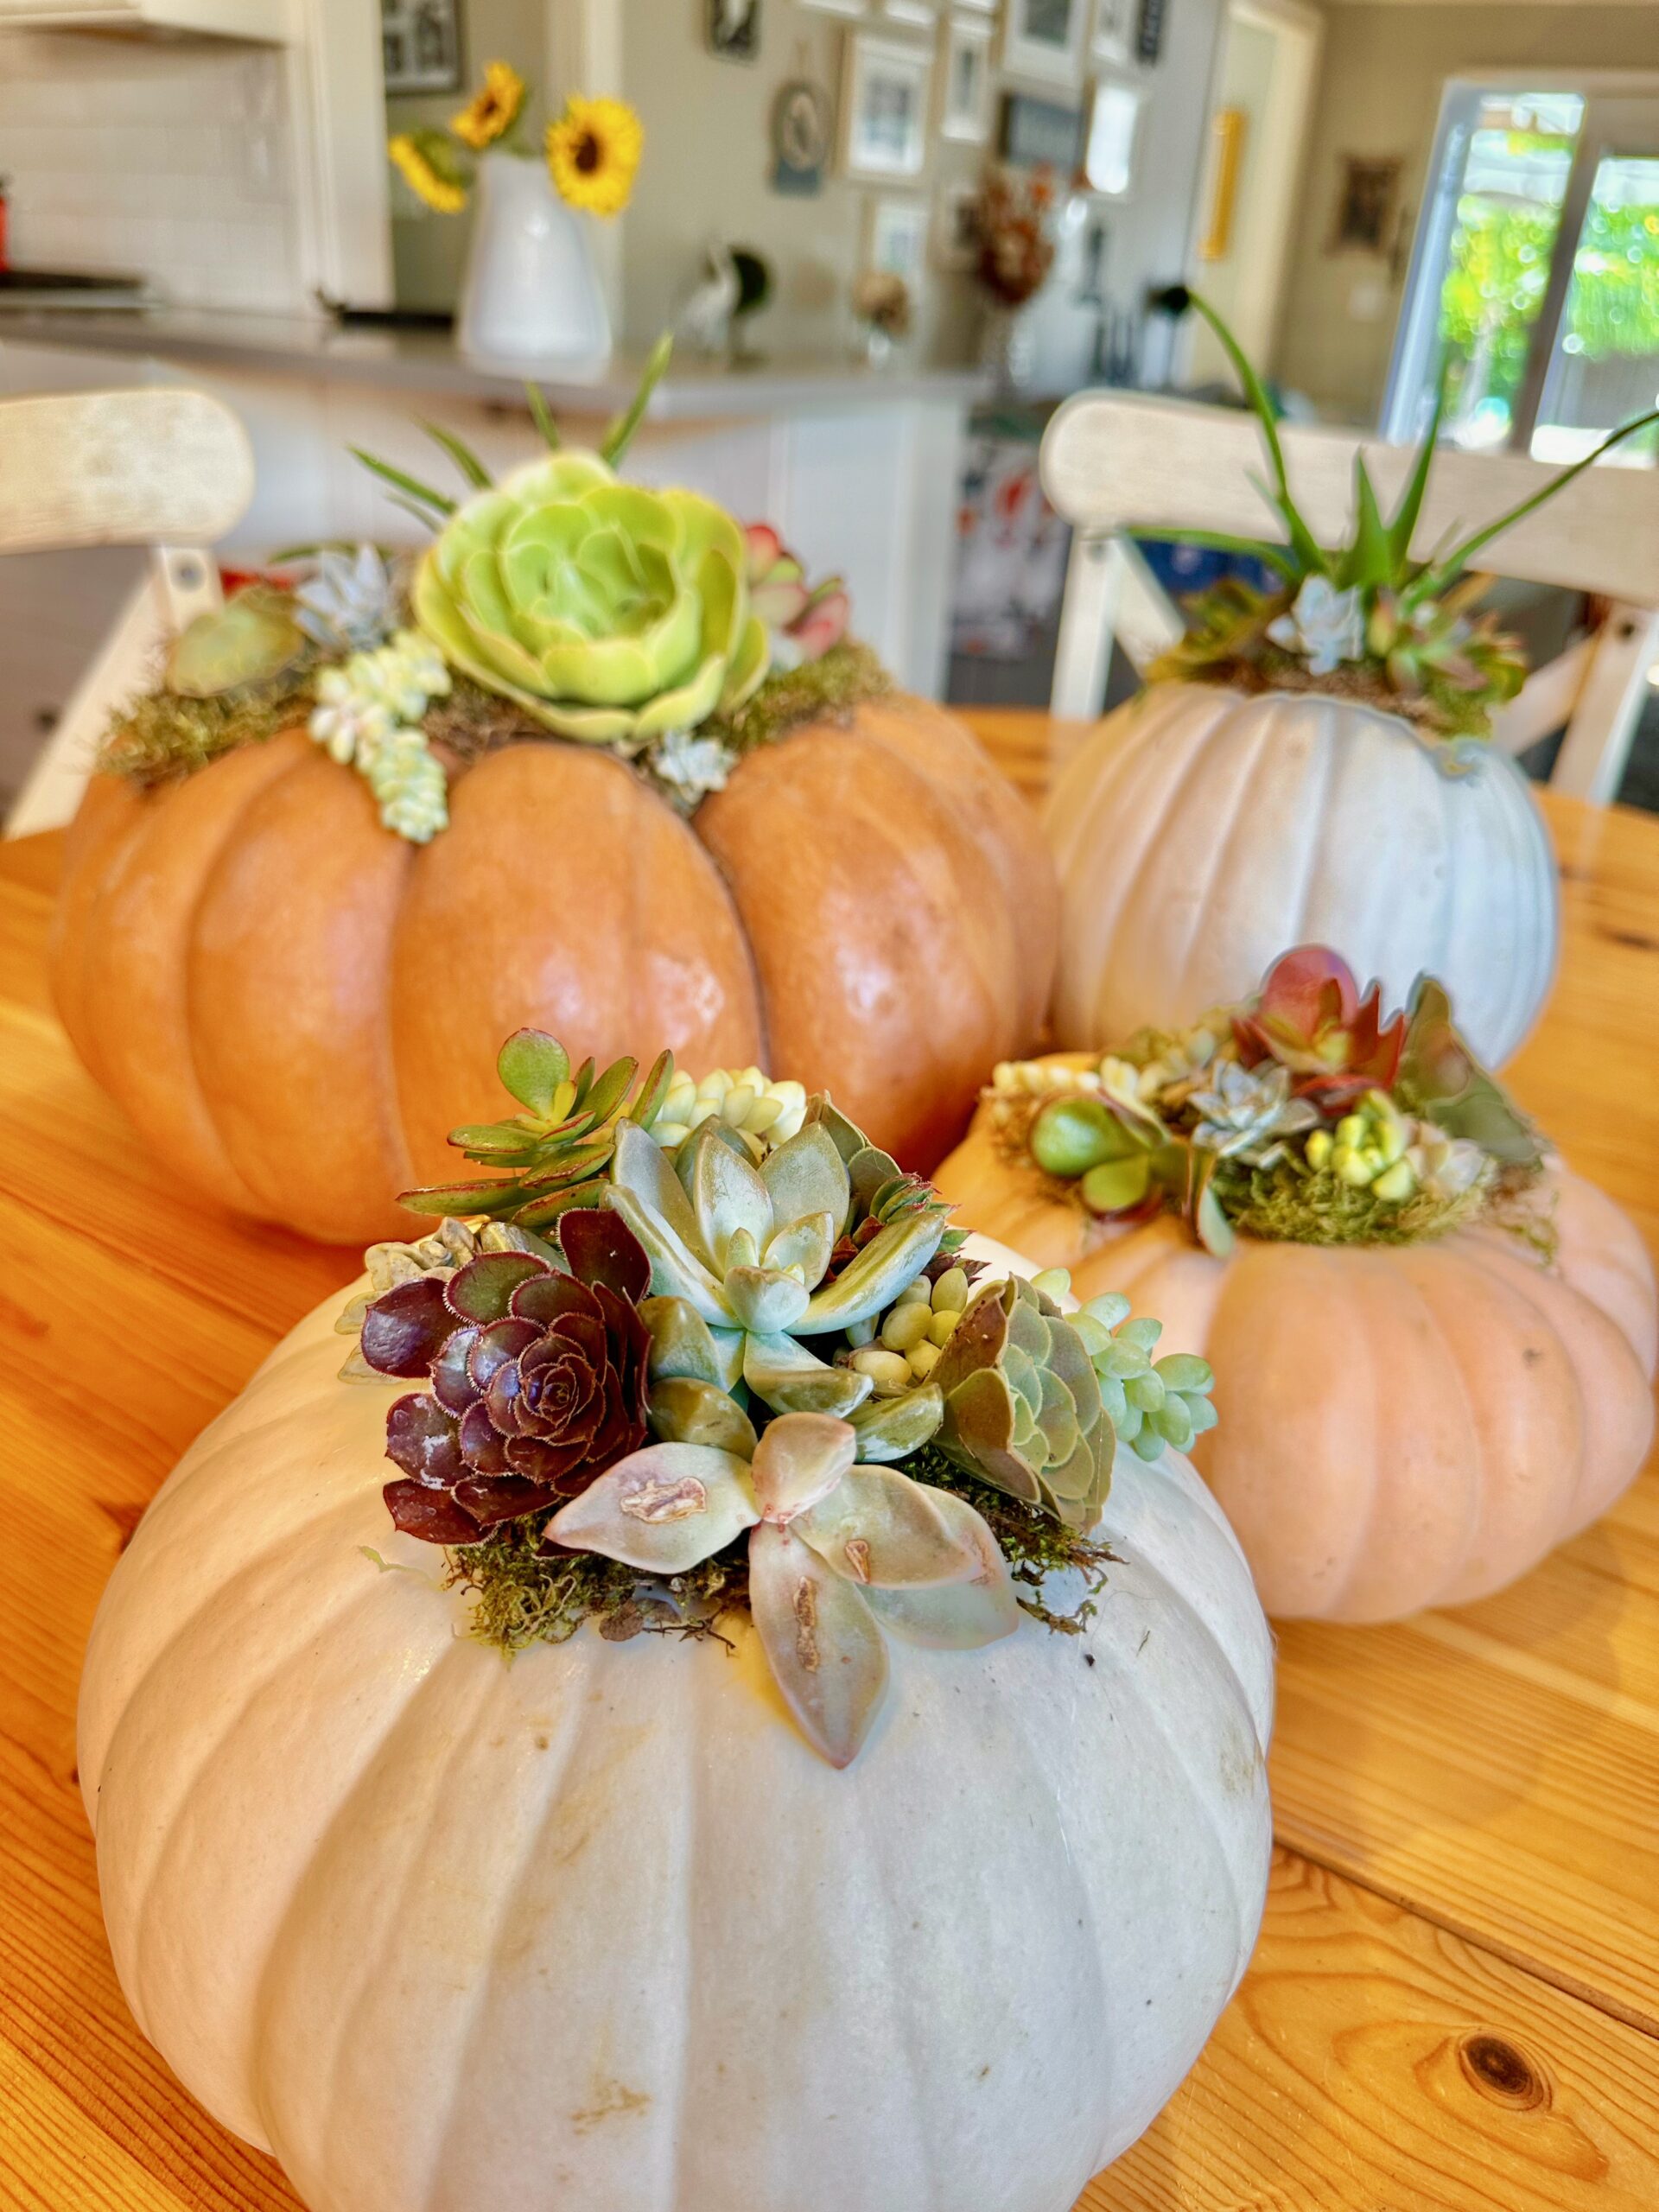
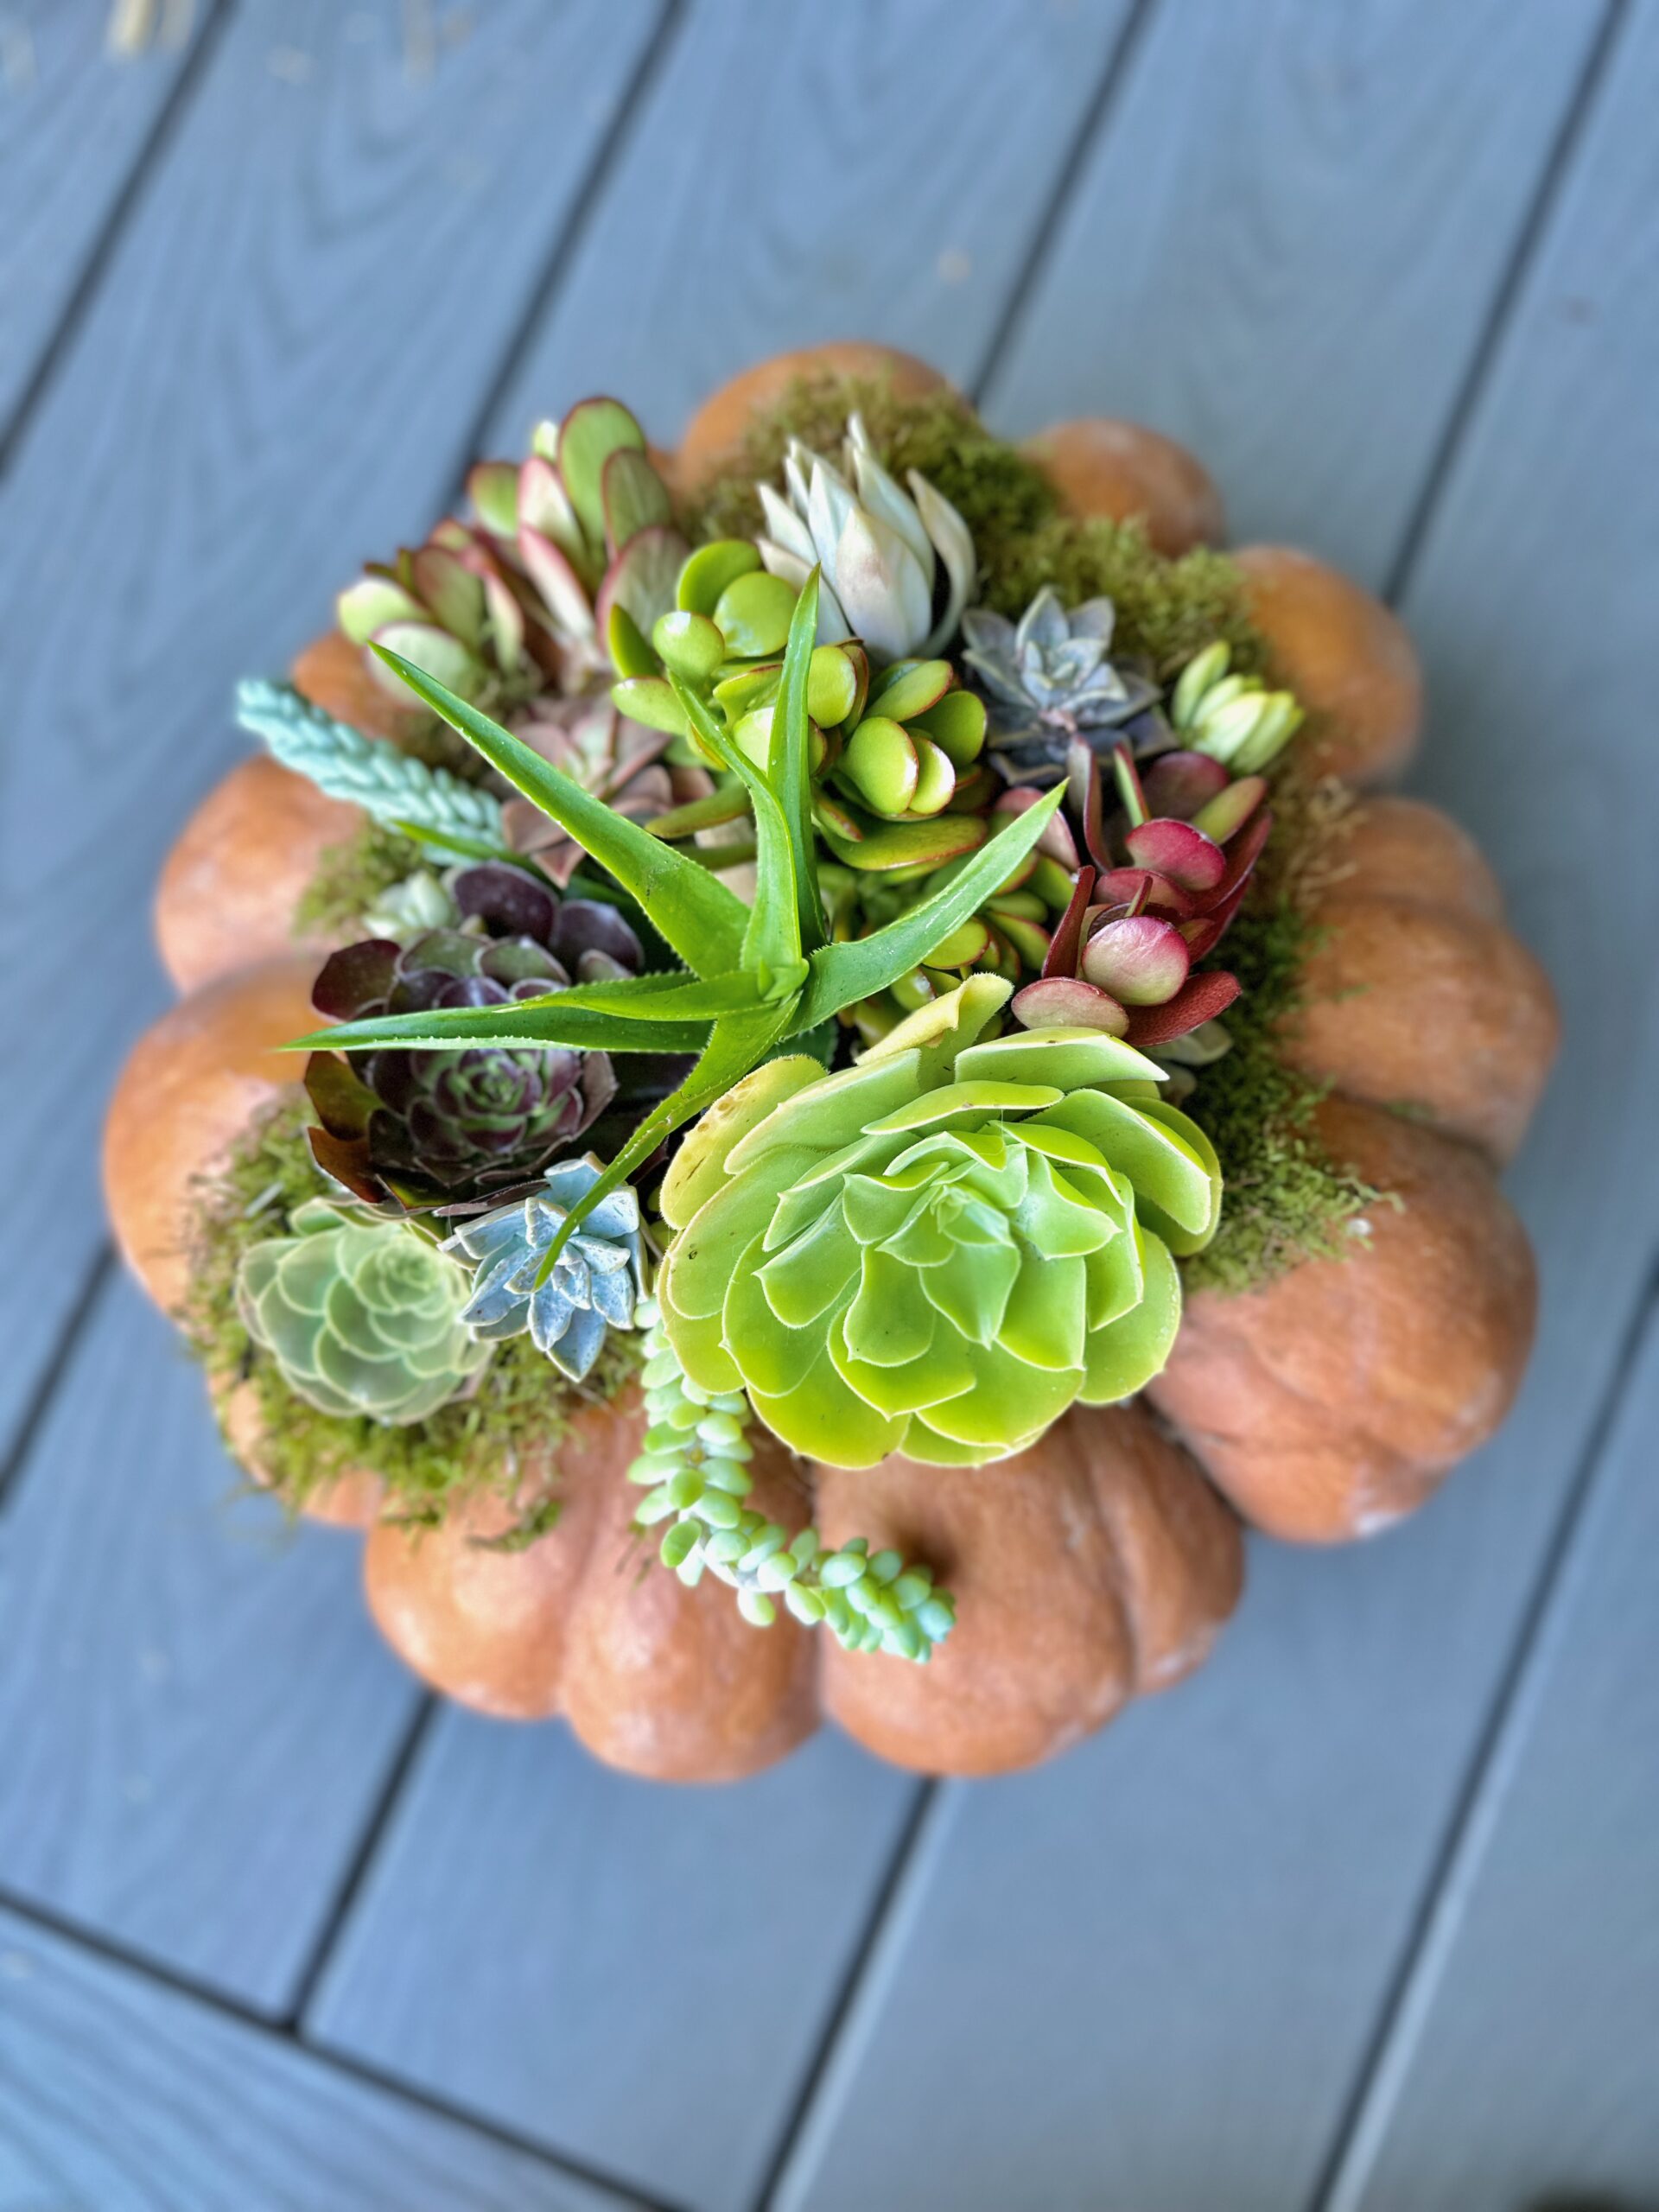
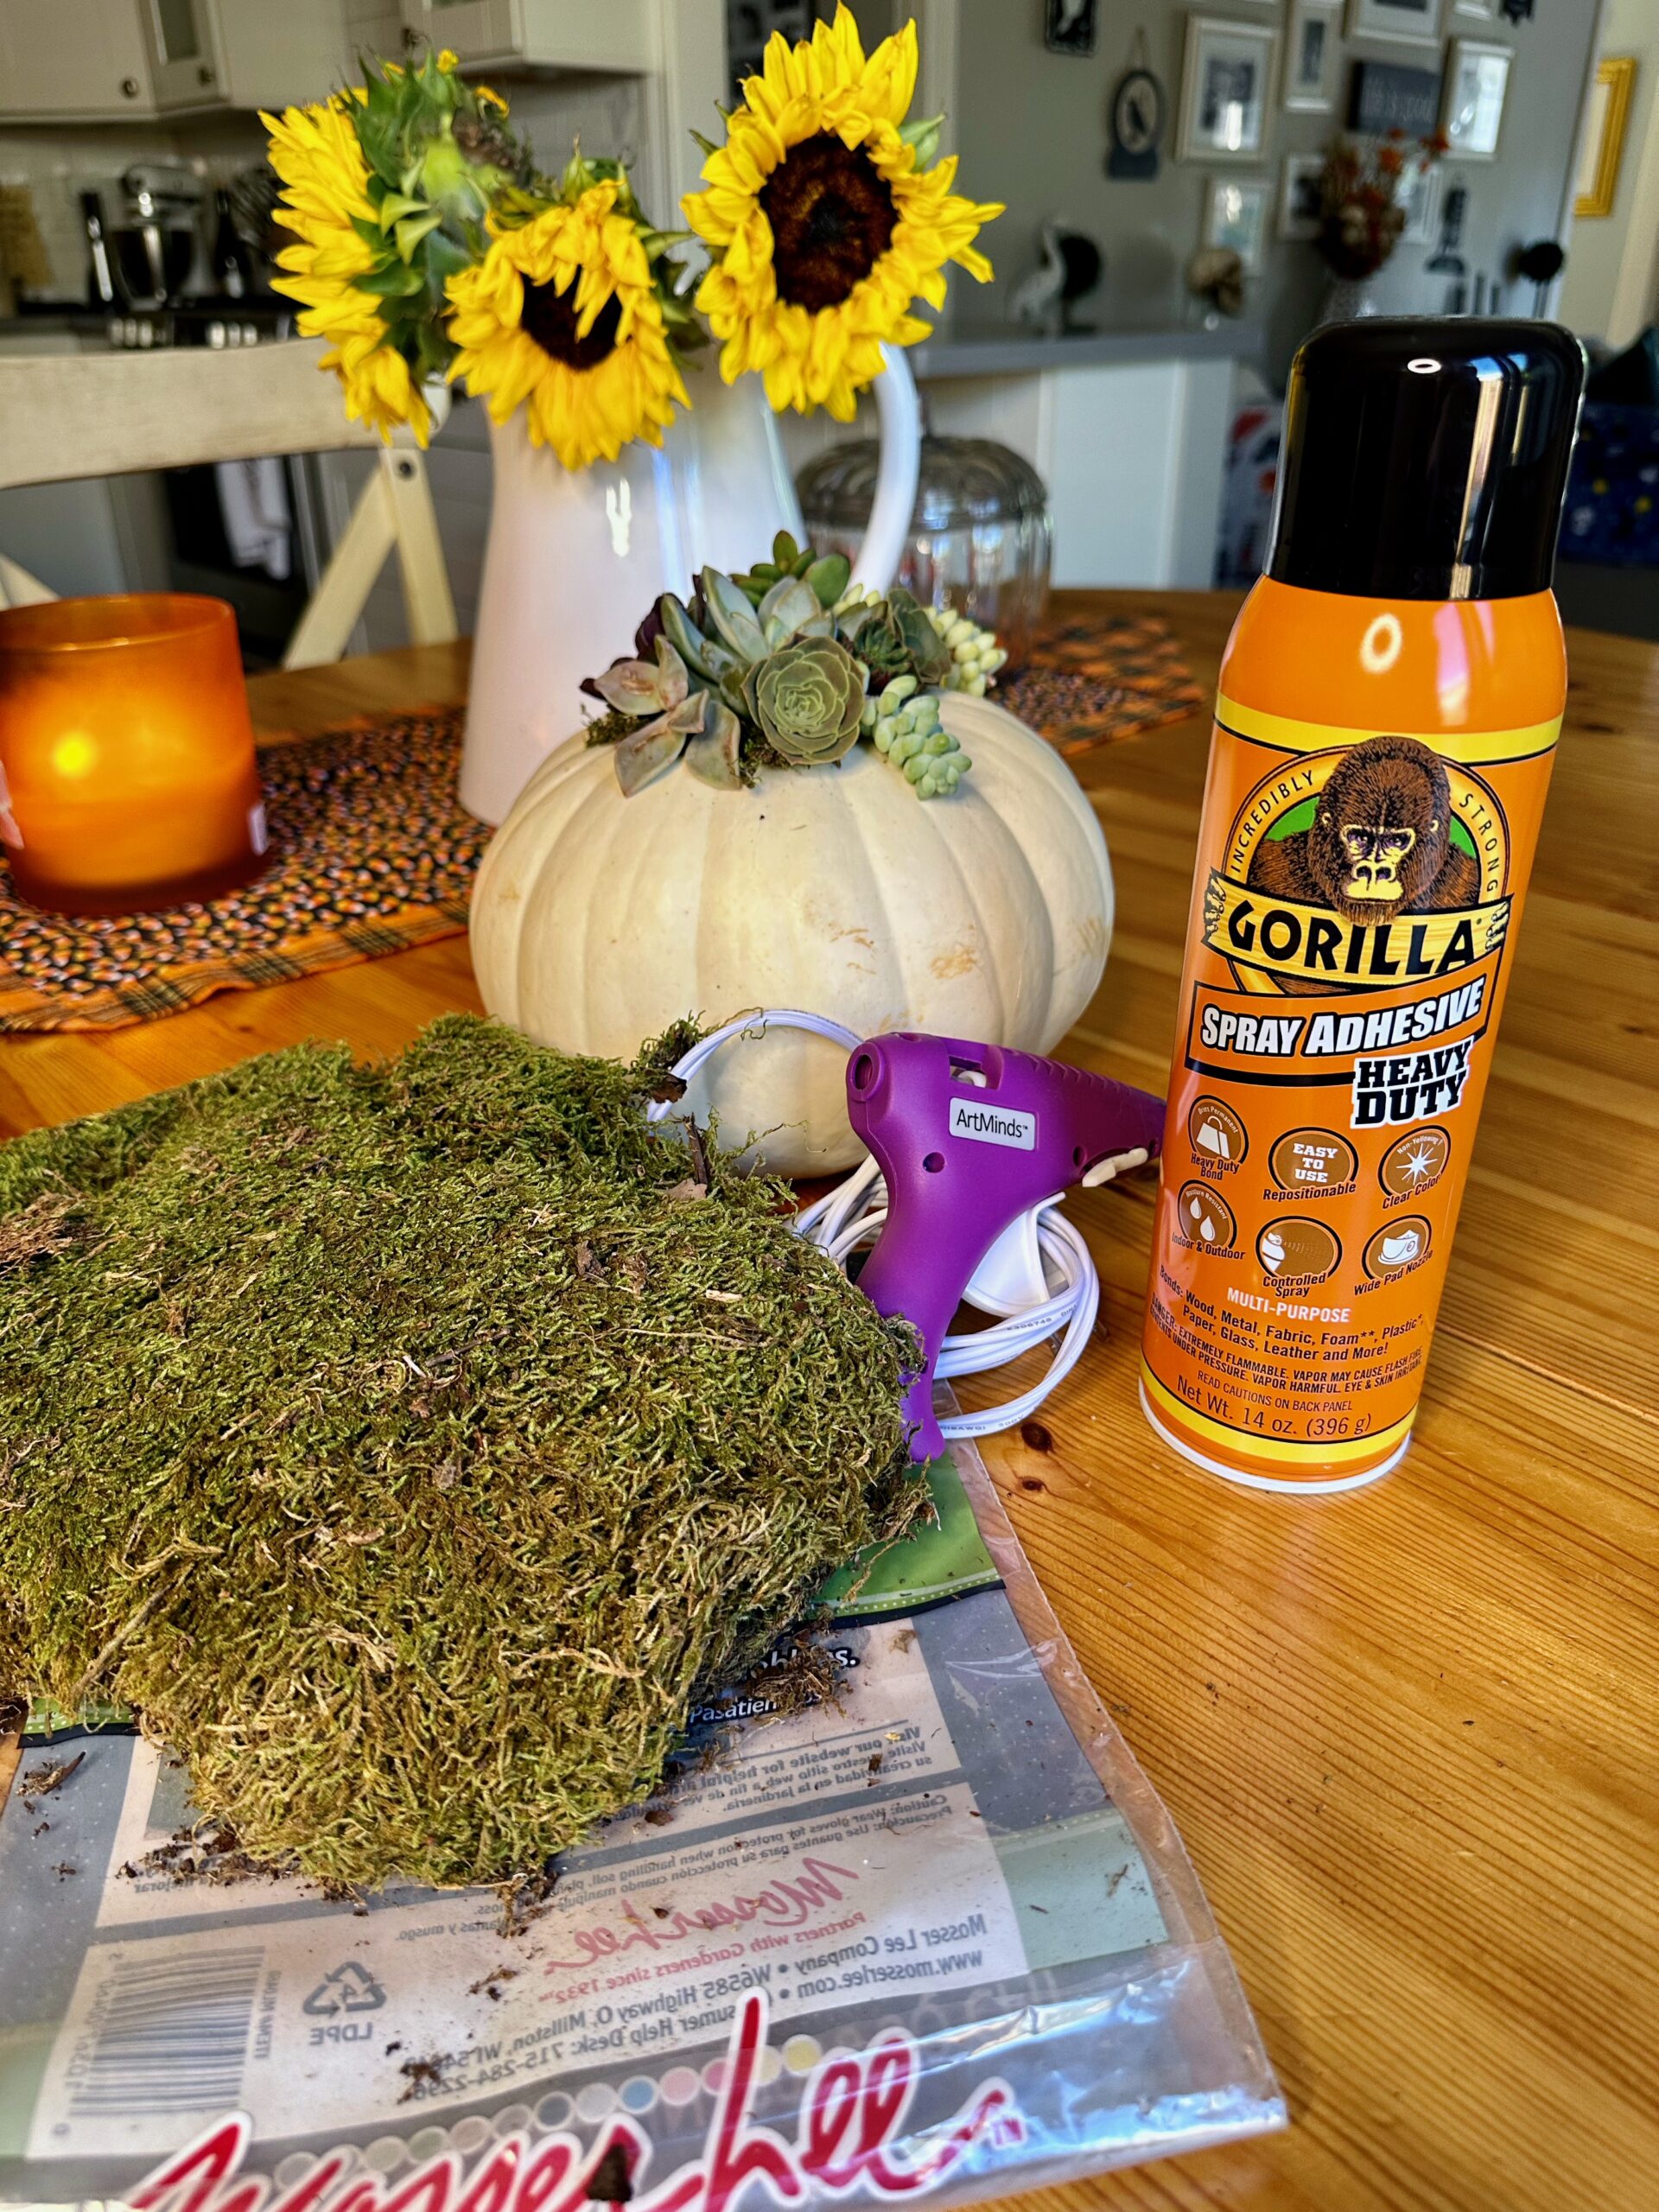
The best part about these easy succulent pumpkins is that no cutting, gutting, or messiness is involved. The pumpkin stays completely intact, which lets it last throughout the season without rotting. Instead of sticking the succulents inside the pumpkin, they lay on top like a miniature garden. They are glued, which doesn’t harm them, into a bed of sphagnum or sheet moss that is adhered to the pumpkin with a spray adhesive. The only upkeep is a little spritzing every few days to keep the succulents and moss moist and looking great.
Easy Succulent Pumpkins
What you need:
- Pumpkin (The Cinderella or flat pumpkin varieties work best.)
- Spray adhesive
- Sphagnum or sheet moss (I used sheet moss and found it very easy to work with.)
- Glue gun
- Succulent cuttings (I collected cuttings from my backyard.)
Instructions
- Make sure the top of your pumpkin is dry and clean. Once dry, spray the adhesive on the top of the pumpkin where you plan to place the moss. The moss comes dry in a package, so be sure not to mist or wet it before you place it onto your pumpkin. Place the moss to cover the area where you want your succulent garden, and let it dry for a couple of minutes so the adhesive sets.
- Take all your succulent cuttings and do a preliminary arrangement before gluing them in place. This will give you an idea of what the finished project will look like before committing.
- Once you’ve decided on a design, it’s then time to heat the glue gun. Don’t worry; the glue gun won’t hurt the succulents. They still find a way of rooting despite the glue. I use a dab or two of glue to attach the succulents to the moss. The goal is to use just enough to hold them in place. I like to start with my largest pieces in the center and work my way out. This is the fun part. Be as creative as you want. I like adding various succulents with different colors and textures to make the piece more interesting.
- Let the glue dry for at least 15 minutes, and give your creation its first misting. Remember to mist it at least once a week to moisten the moss and keep your succulents healthy.

I hope you enjoy making succulent pumpkins as much as I loved making mine. If you are looking for a fall drink to sip on while you admire your new succulent pumpkins, check out my recipe for pumpkin-spiced steamed milk.

Mom of two and seeking sanity in the everyday. Let’s chat about family, school struggles, travel, and living our best life. Located in the San Francisco Bay area.


