Editor’s Note: It’s Halloween season again, and the perfect time to repost directions on how we make our Halloween tunnel. This is one of the most popular posts on Staying Blonde. Even if you’ve read it before, be sure to check it out, as I’ve updated it with improvements and things we’ve learned over the years.
This post contains affiliate links. Staying Blonde’s privacy policy.
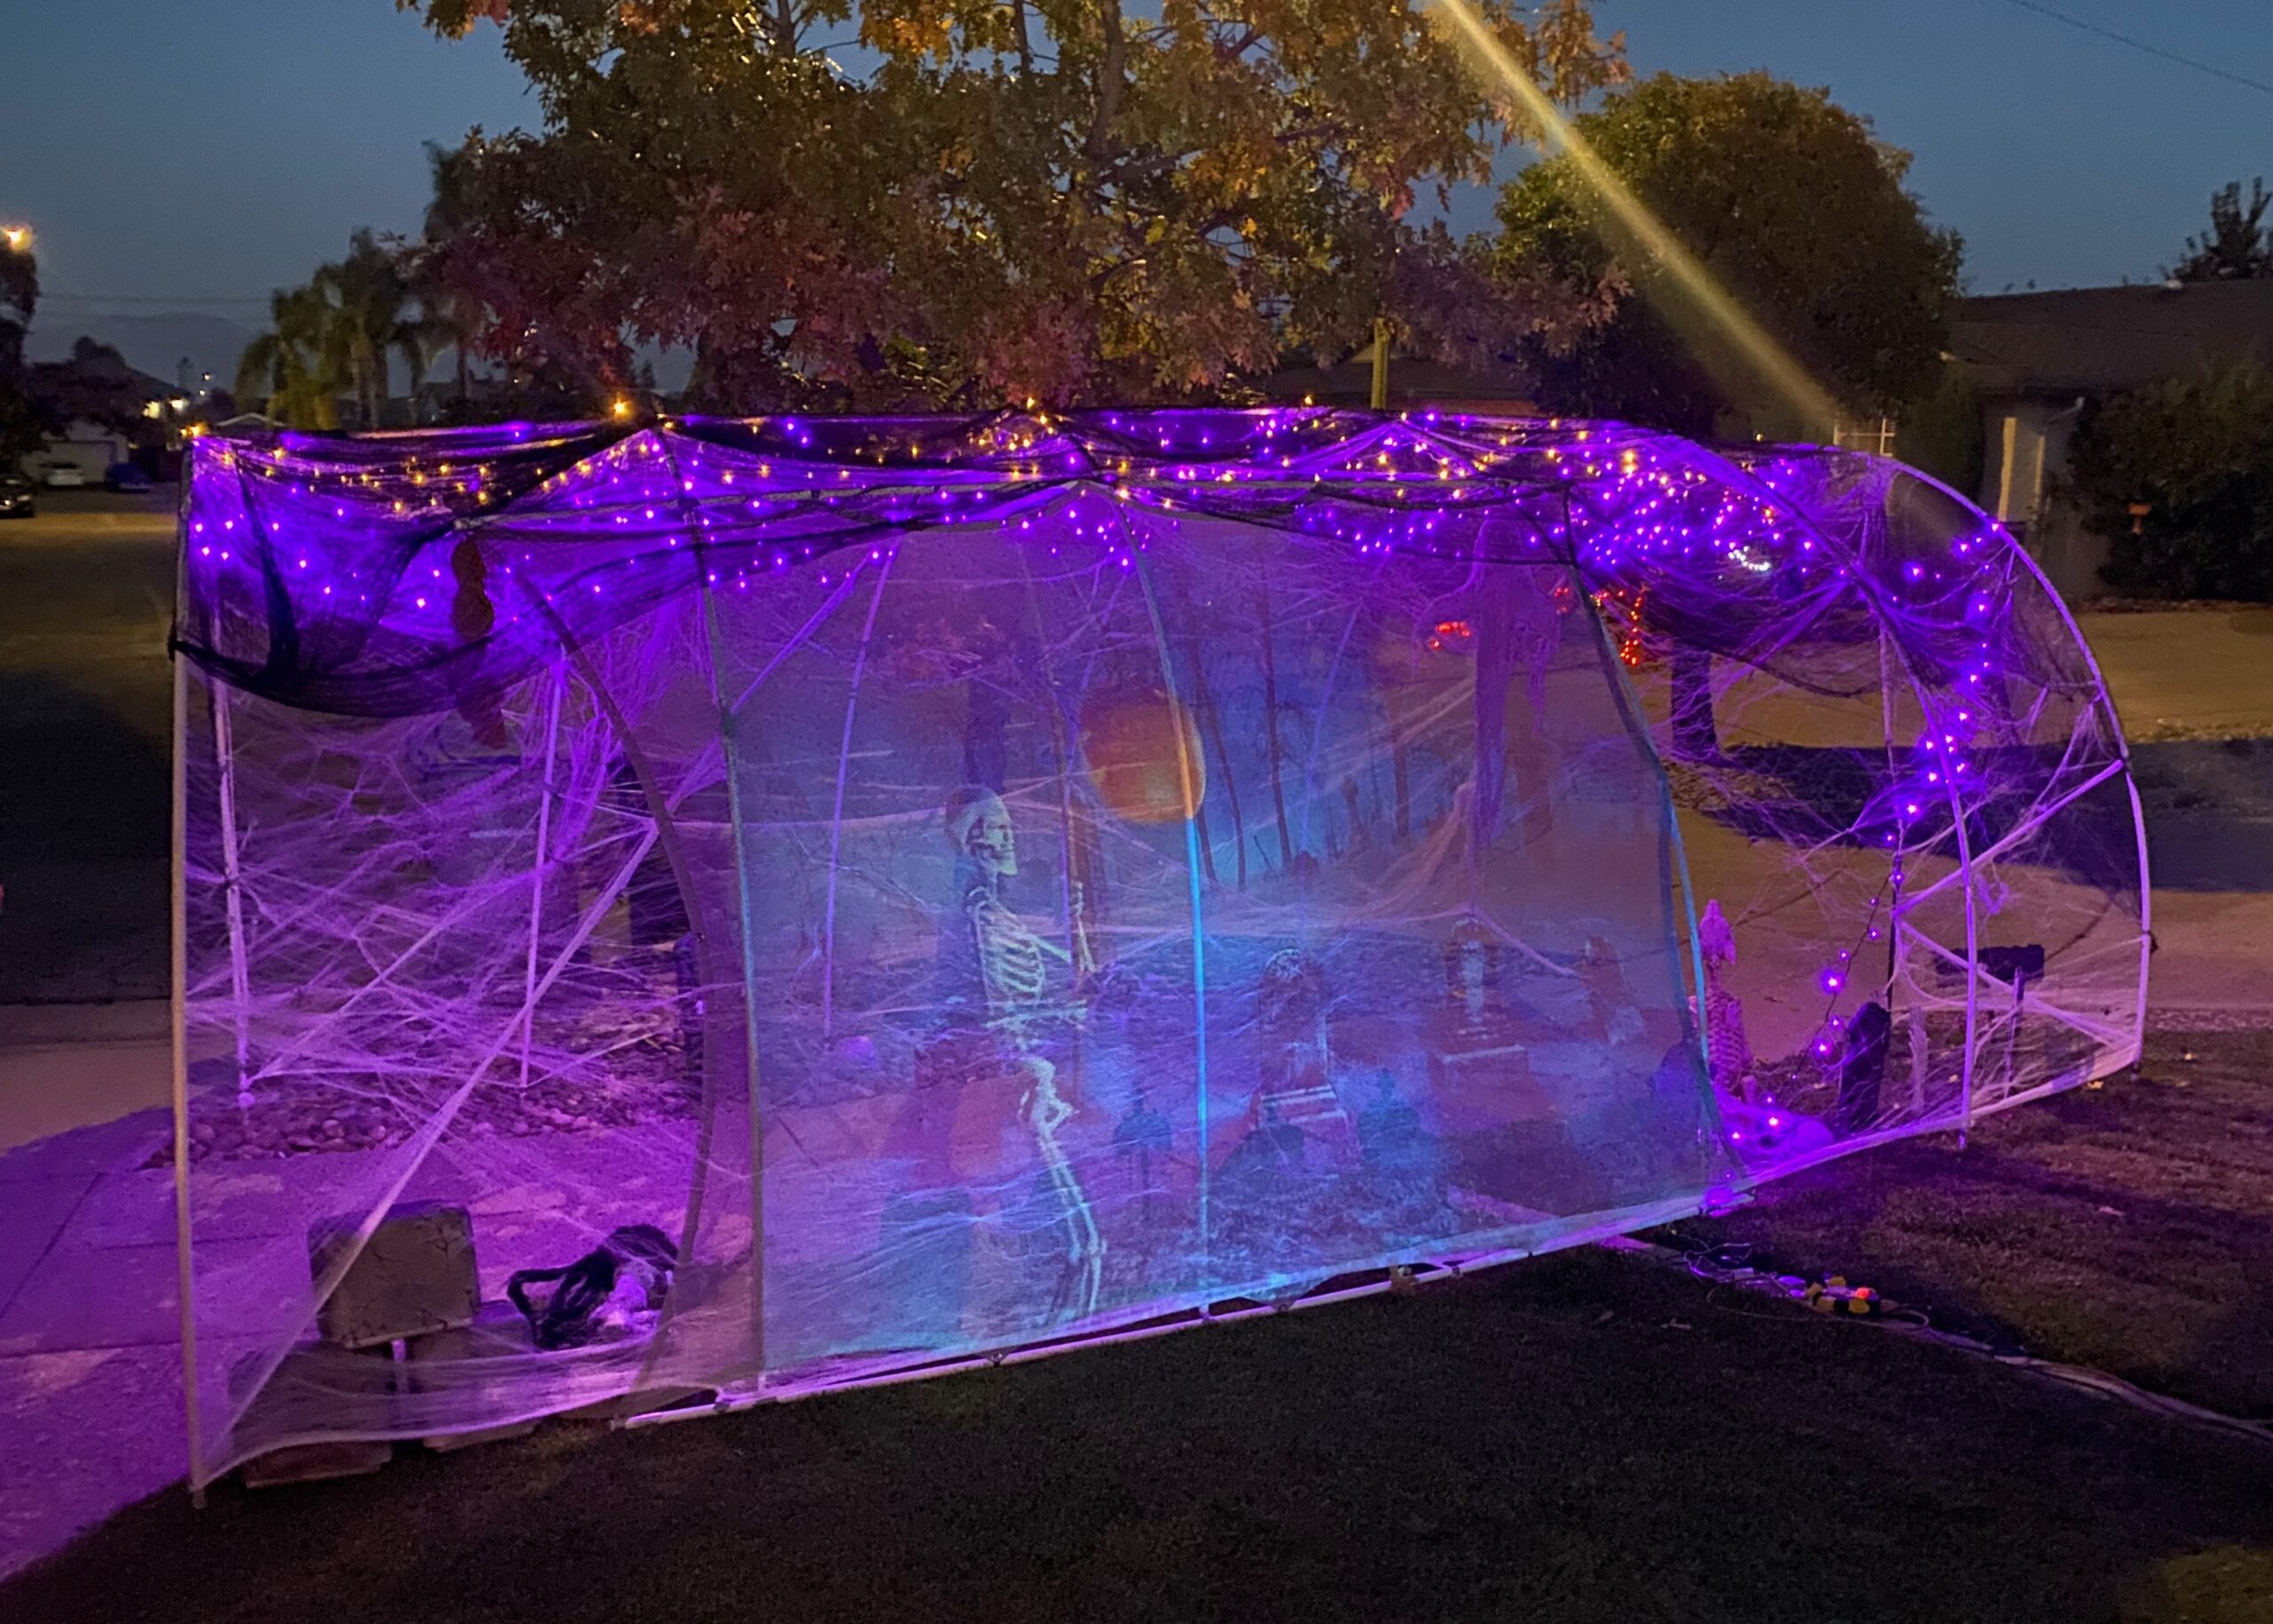
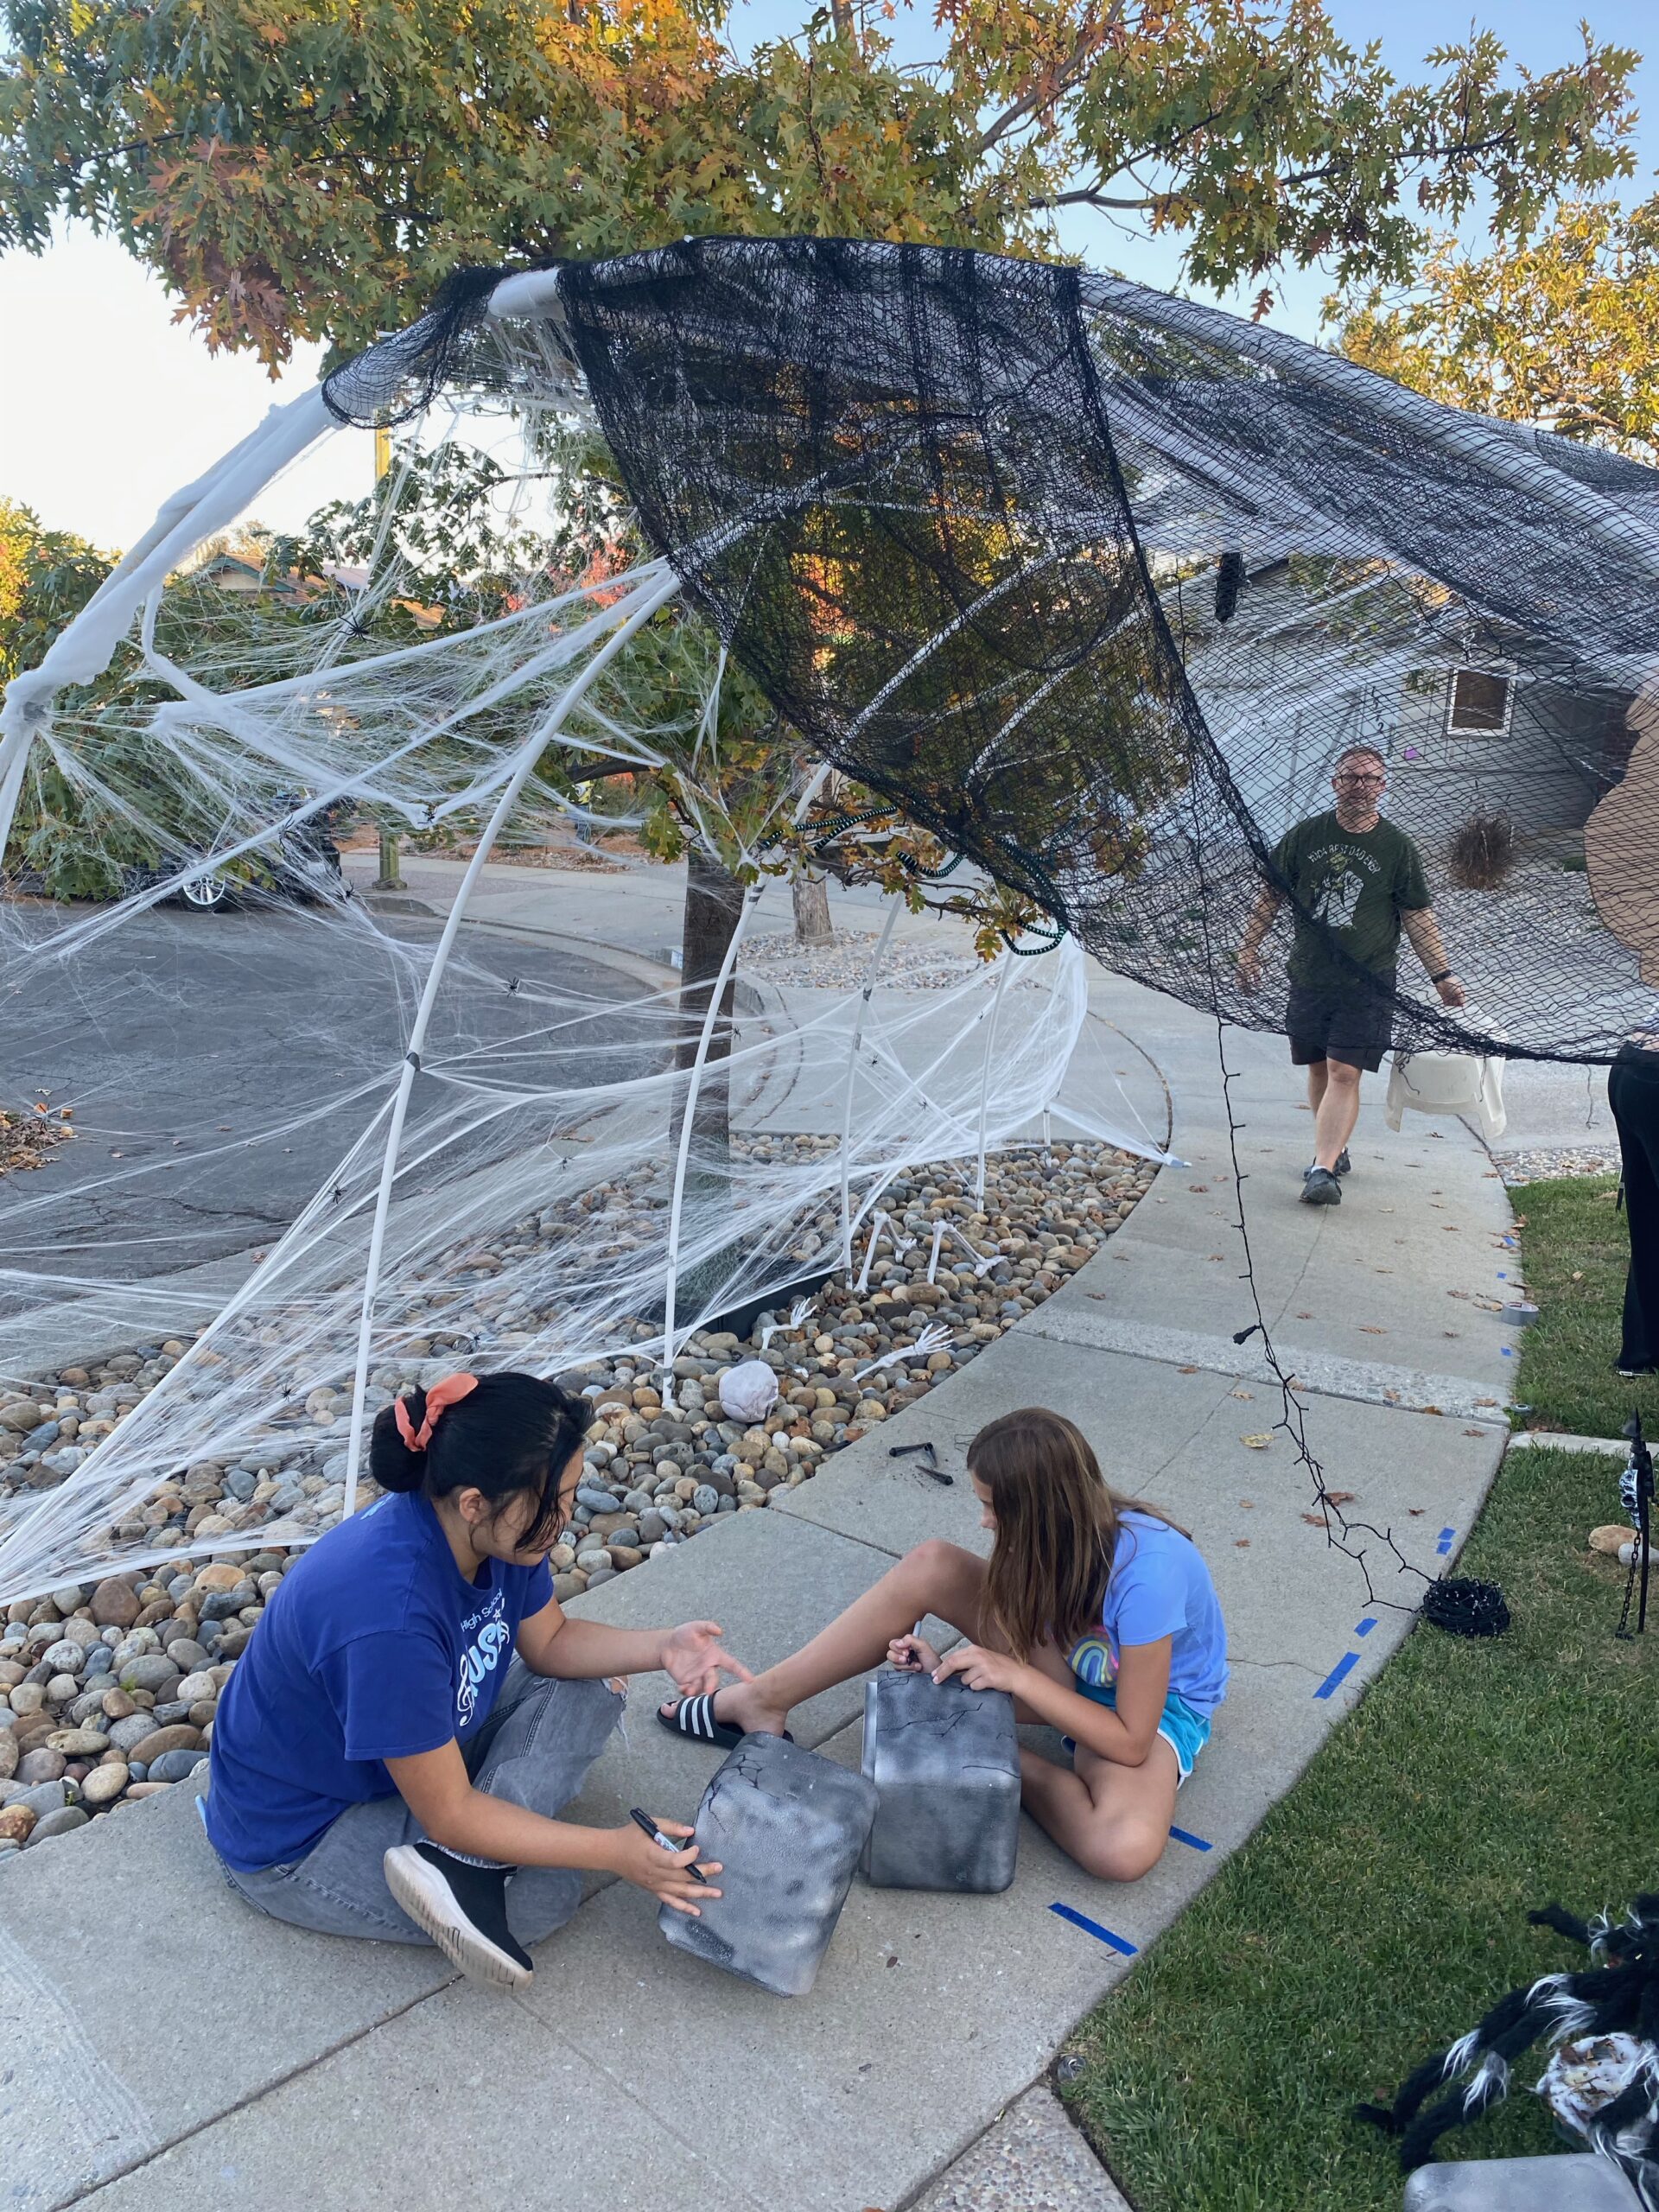
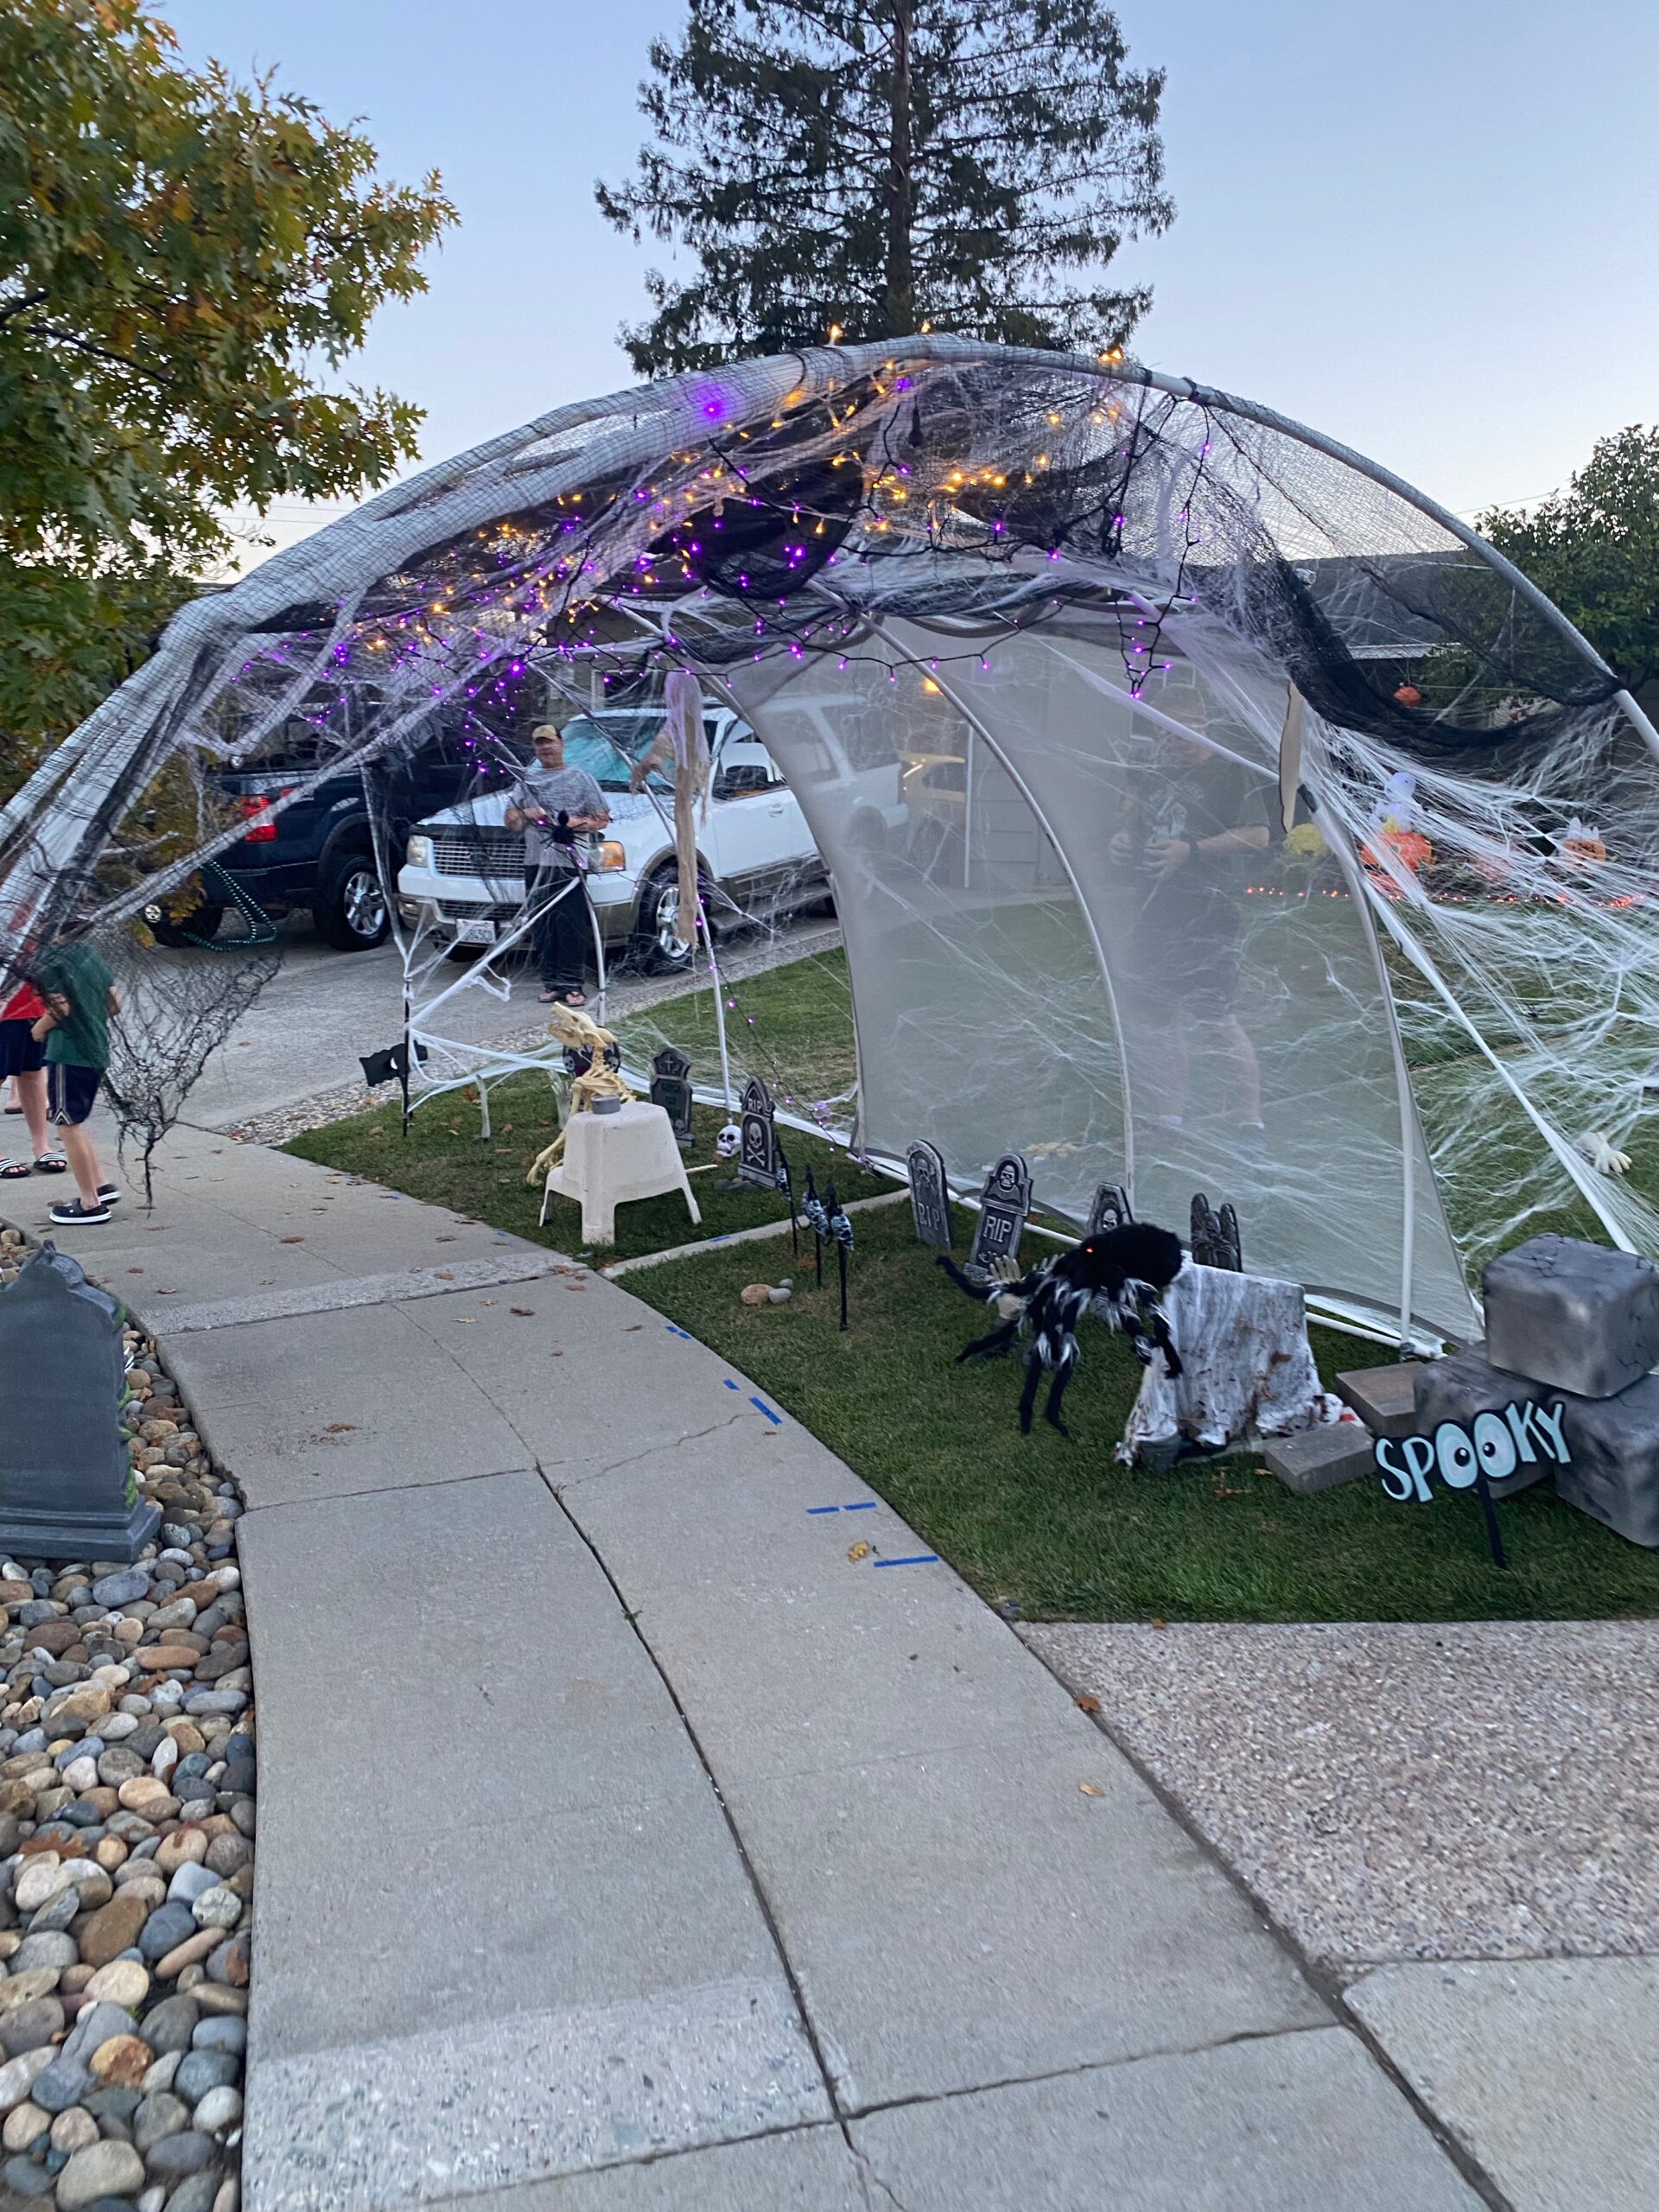
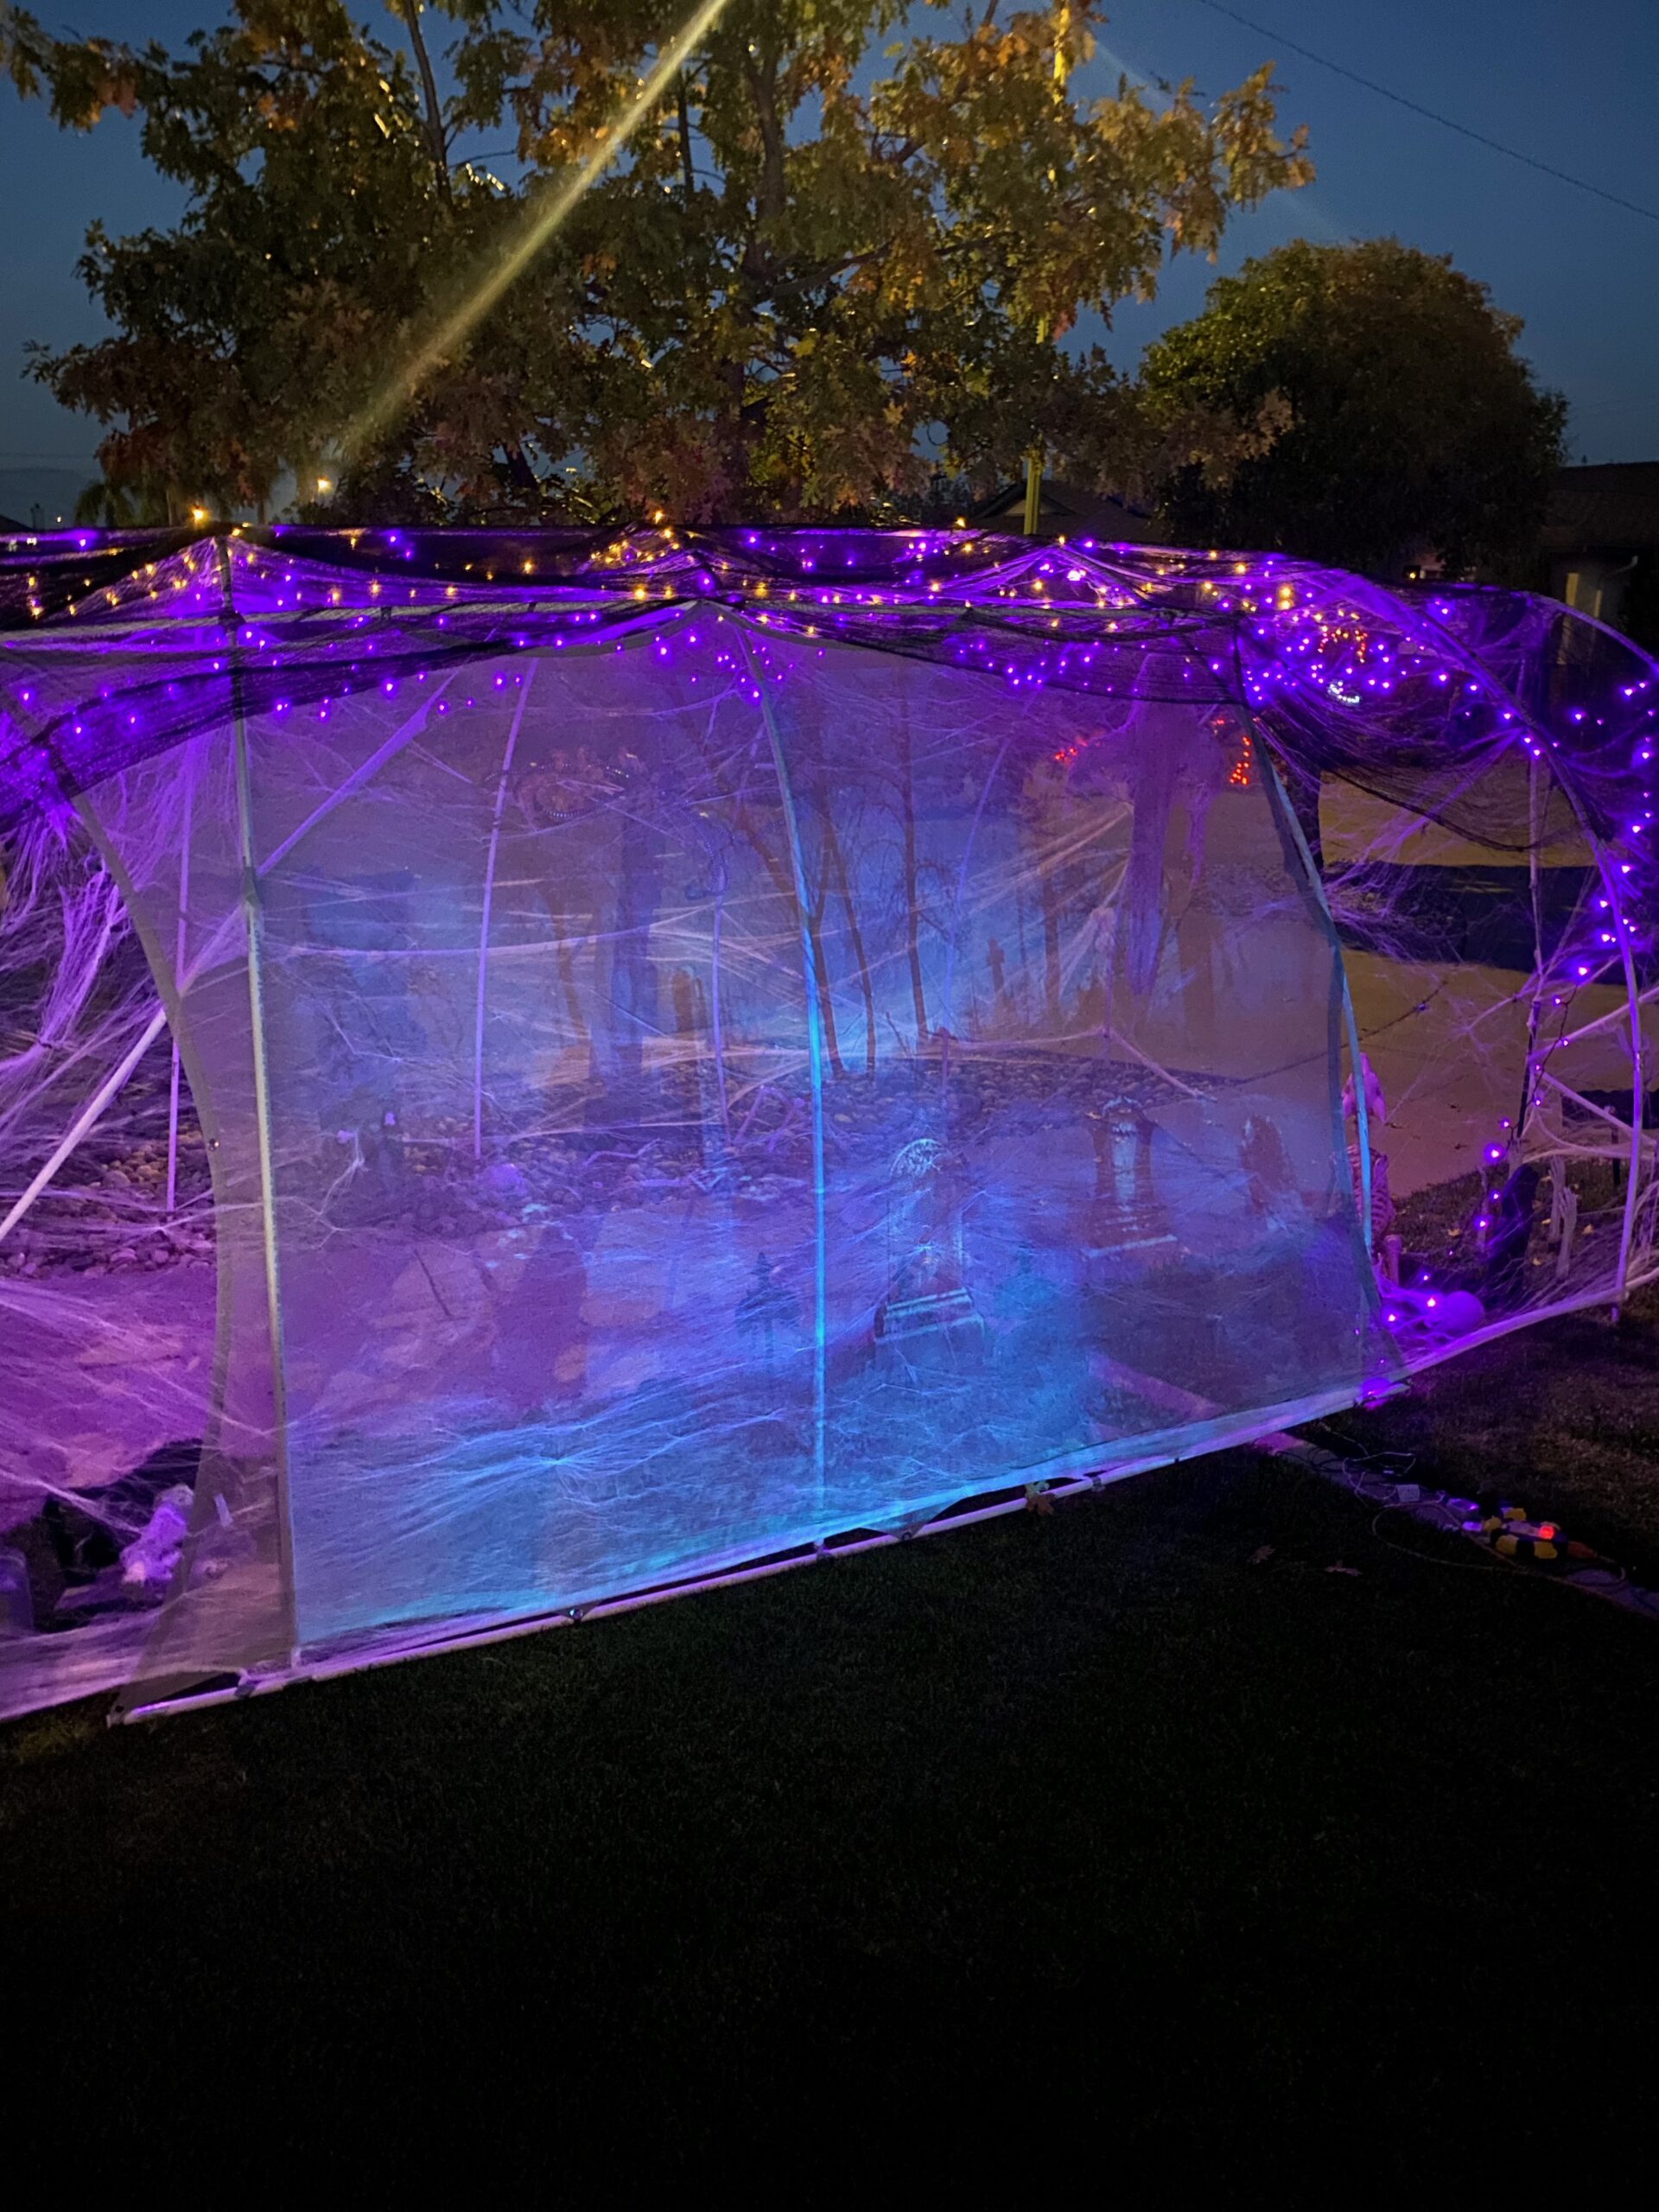
We build our Halloween tunnel almost exactly as we build the Holiday Arches. After all, they are constructed with the same tubes and connectors… just decorated for a different season. There is, however, one big difference: we attach a projector screen to one side of the tunnel for Halloween night. We use our projector to show spooky videos that can be seen inside and outside the tunnel. It looks super cool, and the kids get a kick out of it. Besides the video screen, we include lots of spooky decor like spider webbing, black mesh/gauze, and orange and deep purple lights.
This year, we have considered adding a more solid cover to give it that true tunnel effect and amp up the spooky vibe. I will let you know how it goes, but we get excited about raising the “spooky” bar each year. Neighbors have already started to swing by and let us know how much they look forward to it!
Below is the supply list and instructions for making your Haunted Halloween Tunnel. If you don’t intend to project a video, you will not need the additional two PVC pipes or the screen.
Supply List:
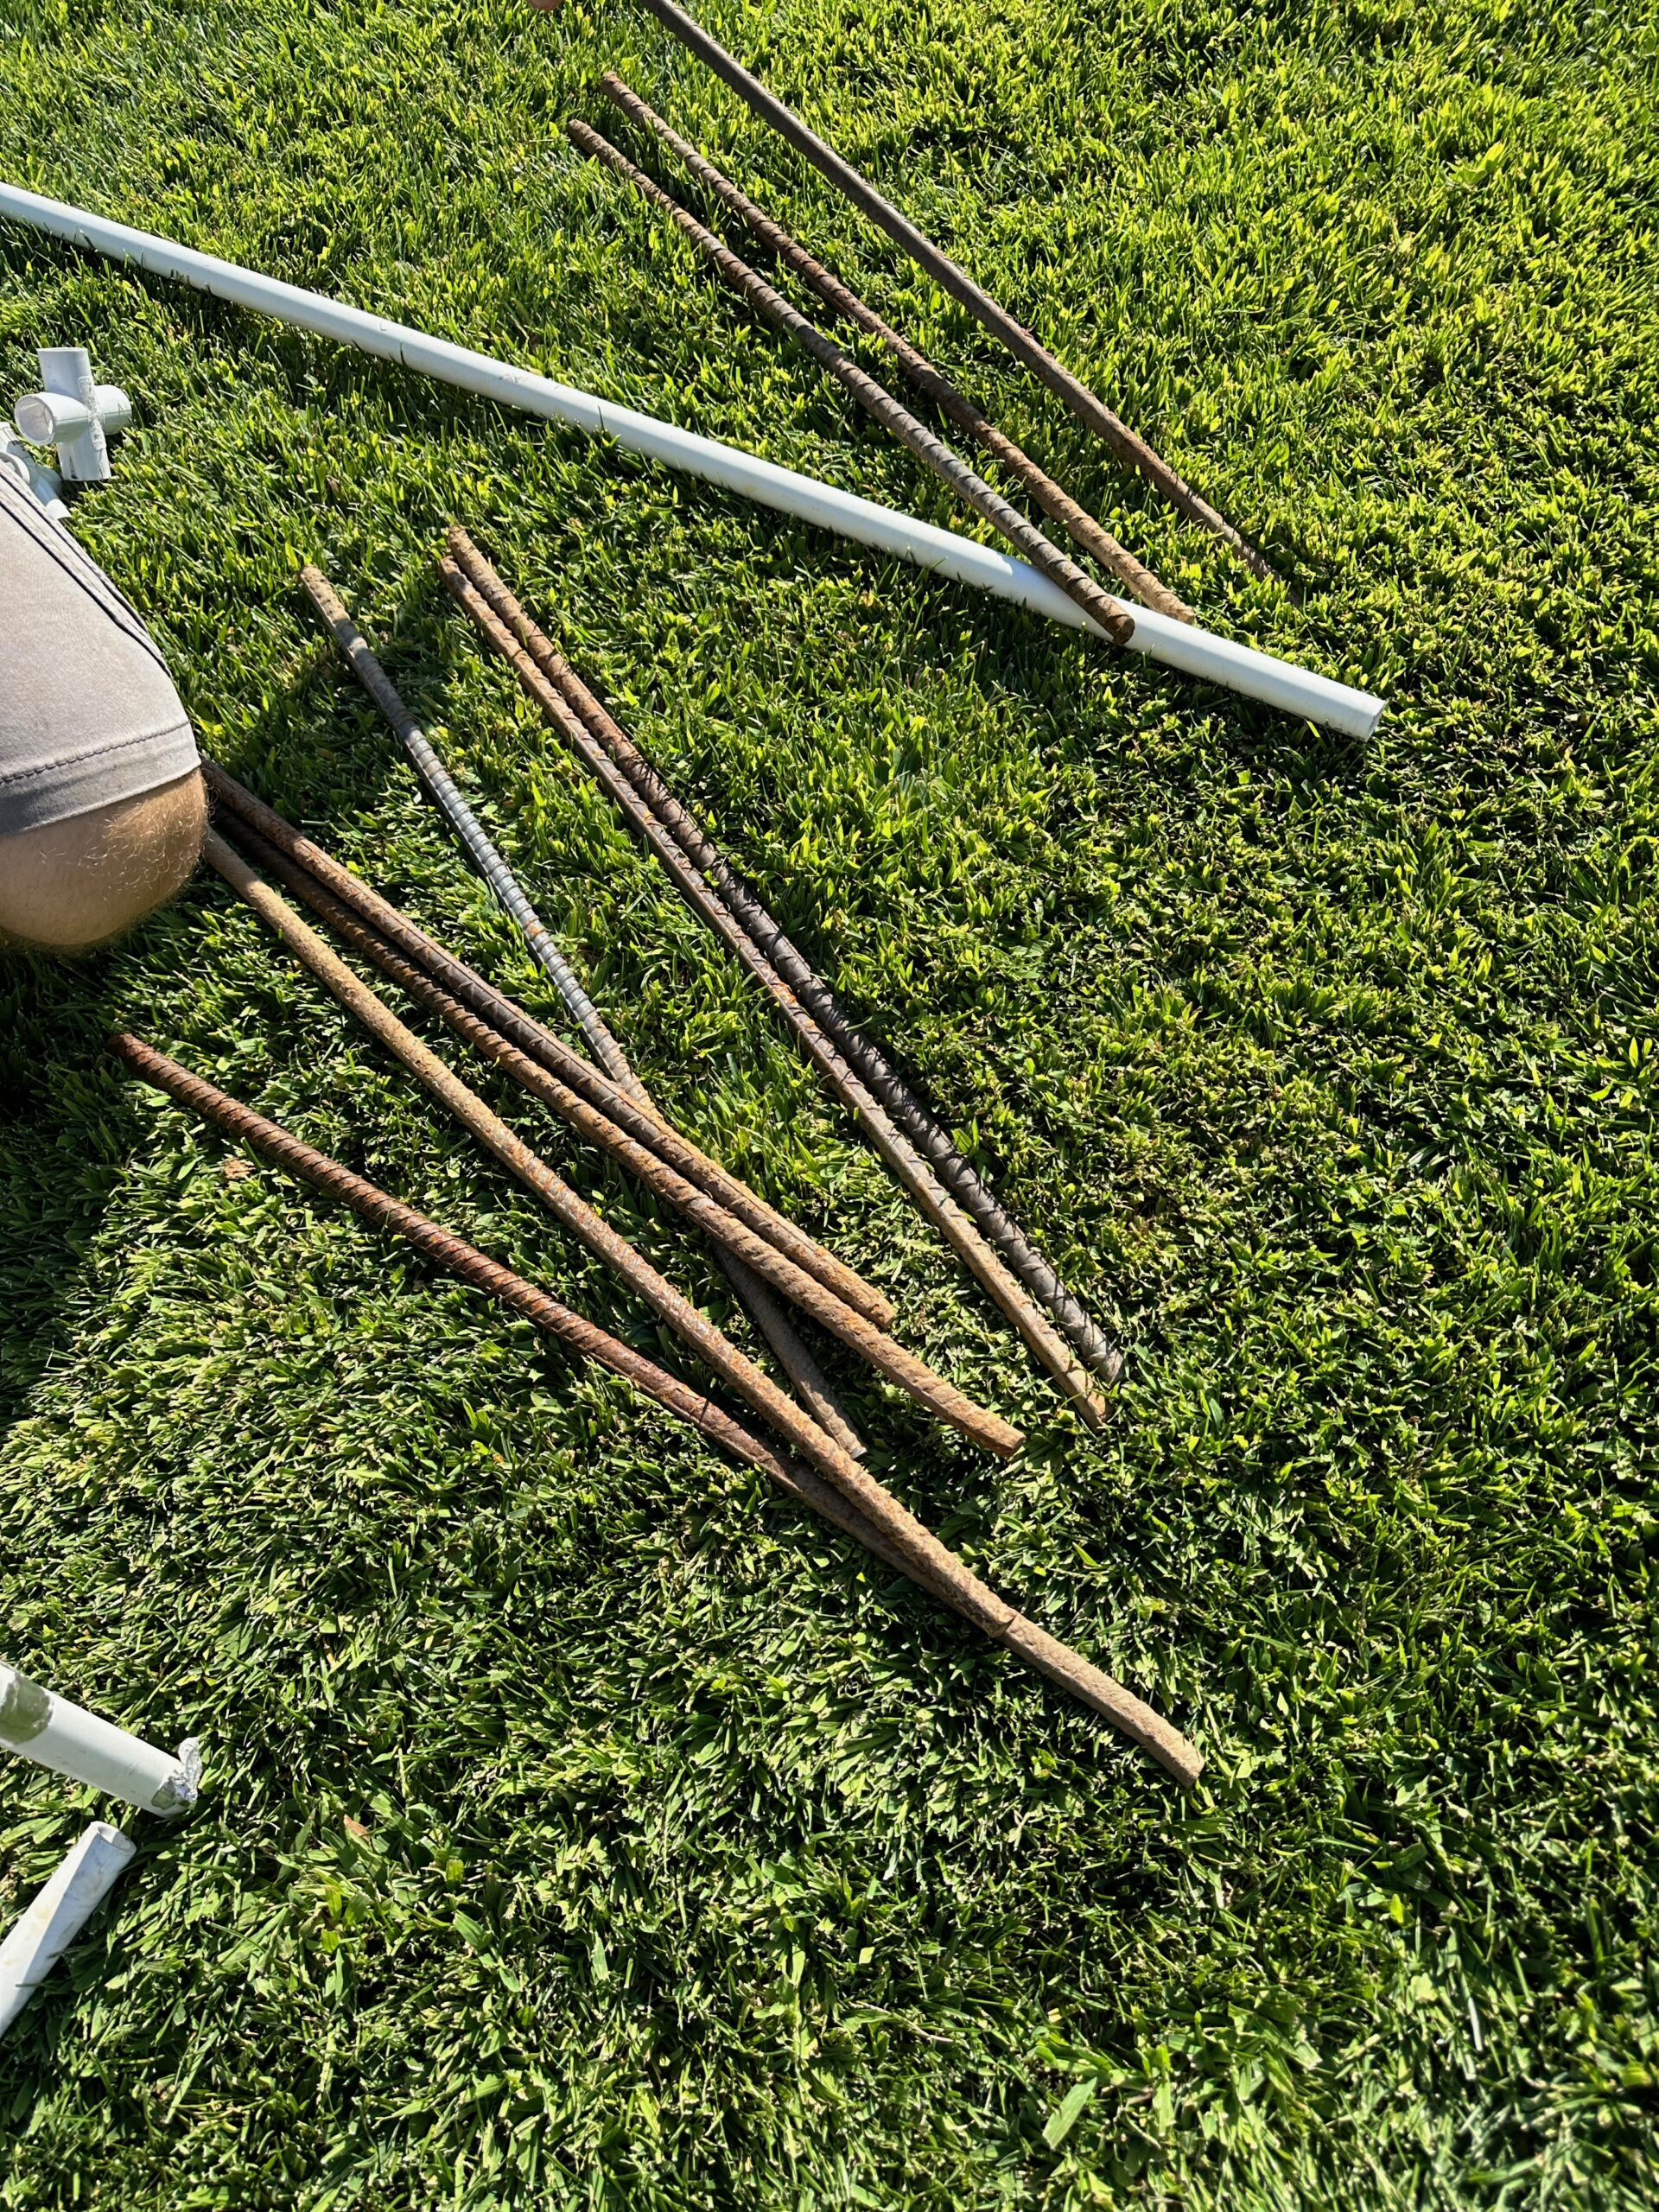
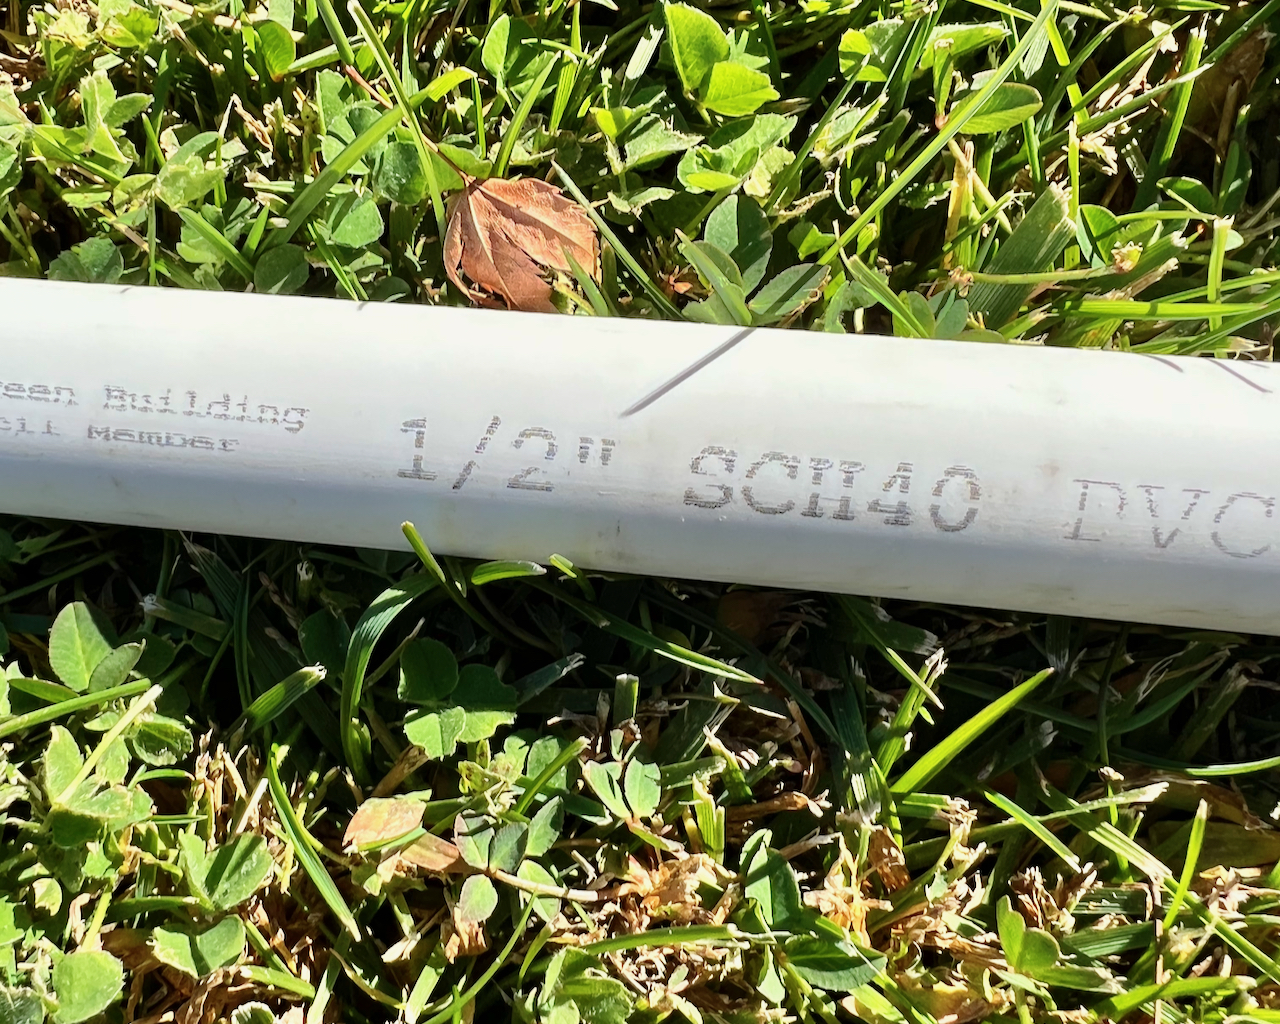
- 7 PVC Pipes: 1/2 in. x 10 ft, Schedule 40 PVC Plain End Pipe
- 6 Rebar Stakes: 3/8 in. x 2 ft. Rebar
- 2 Tee Connectors: 1/2″ PVC Schedule 40 S x S x S Tee
- 1 Cross Connector: 1/2 in. PVC Schedule 40 S x S x S x S Cross
- Black Mesh Gauze
- Spider Webbing
- Halloween Lights
- Halloween Decor
If you are planning on projecting a video, you will need the following additional items
- 2 PVC Pipes:1/2 in. x 10 ft, Schedule 40 PVC Plain End Pipe
- Projector Screen
- Projector
- Clips or zip ties for attaching the screen
- Our videos are from AtmosFX
Instructions
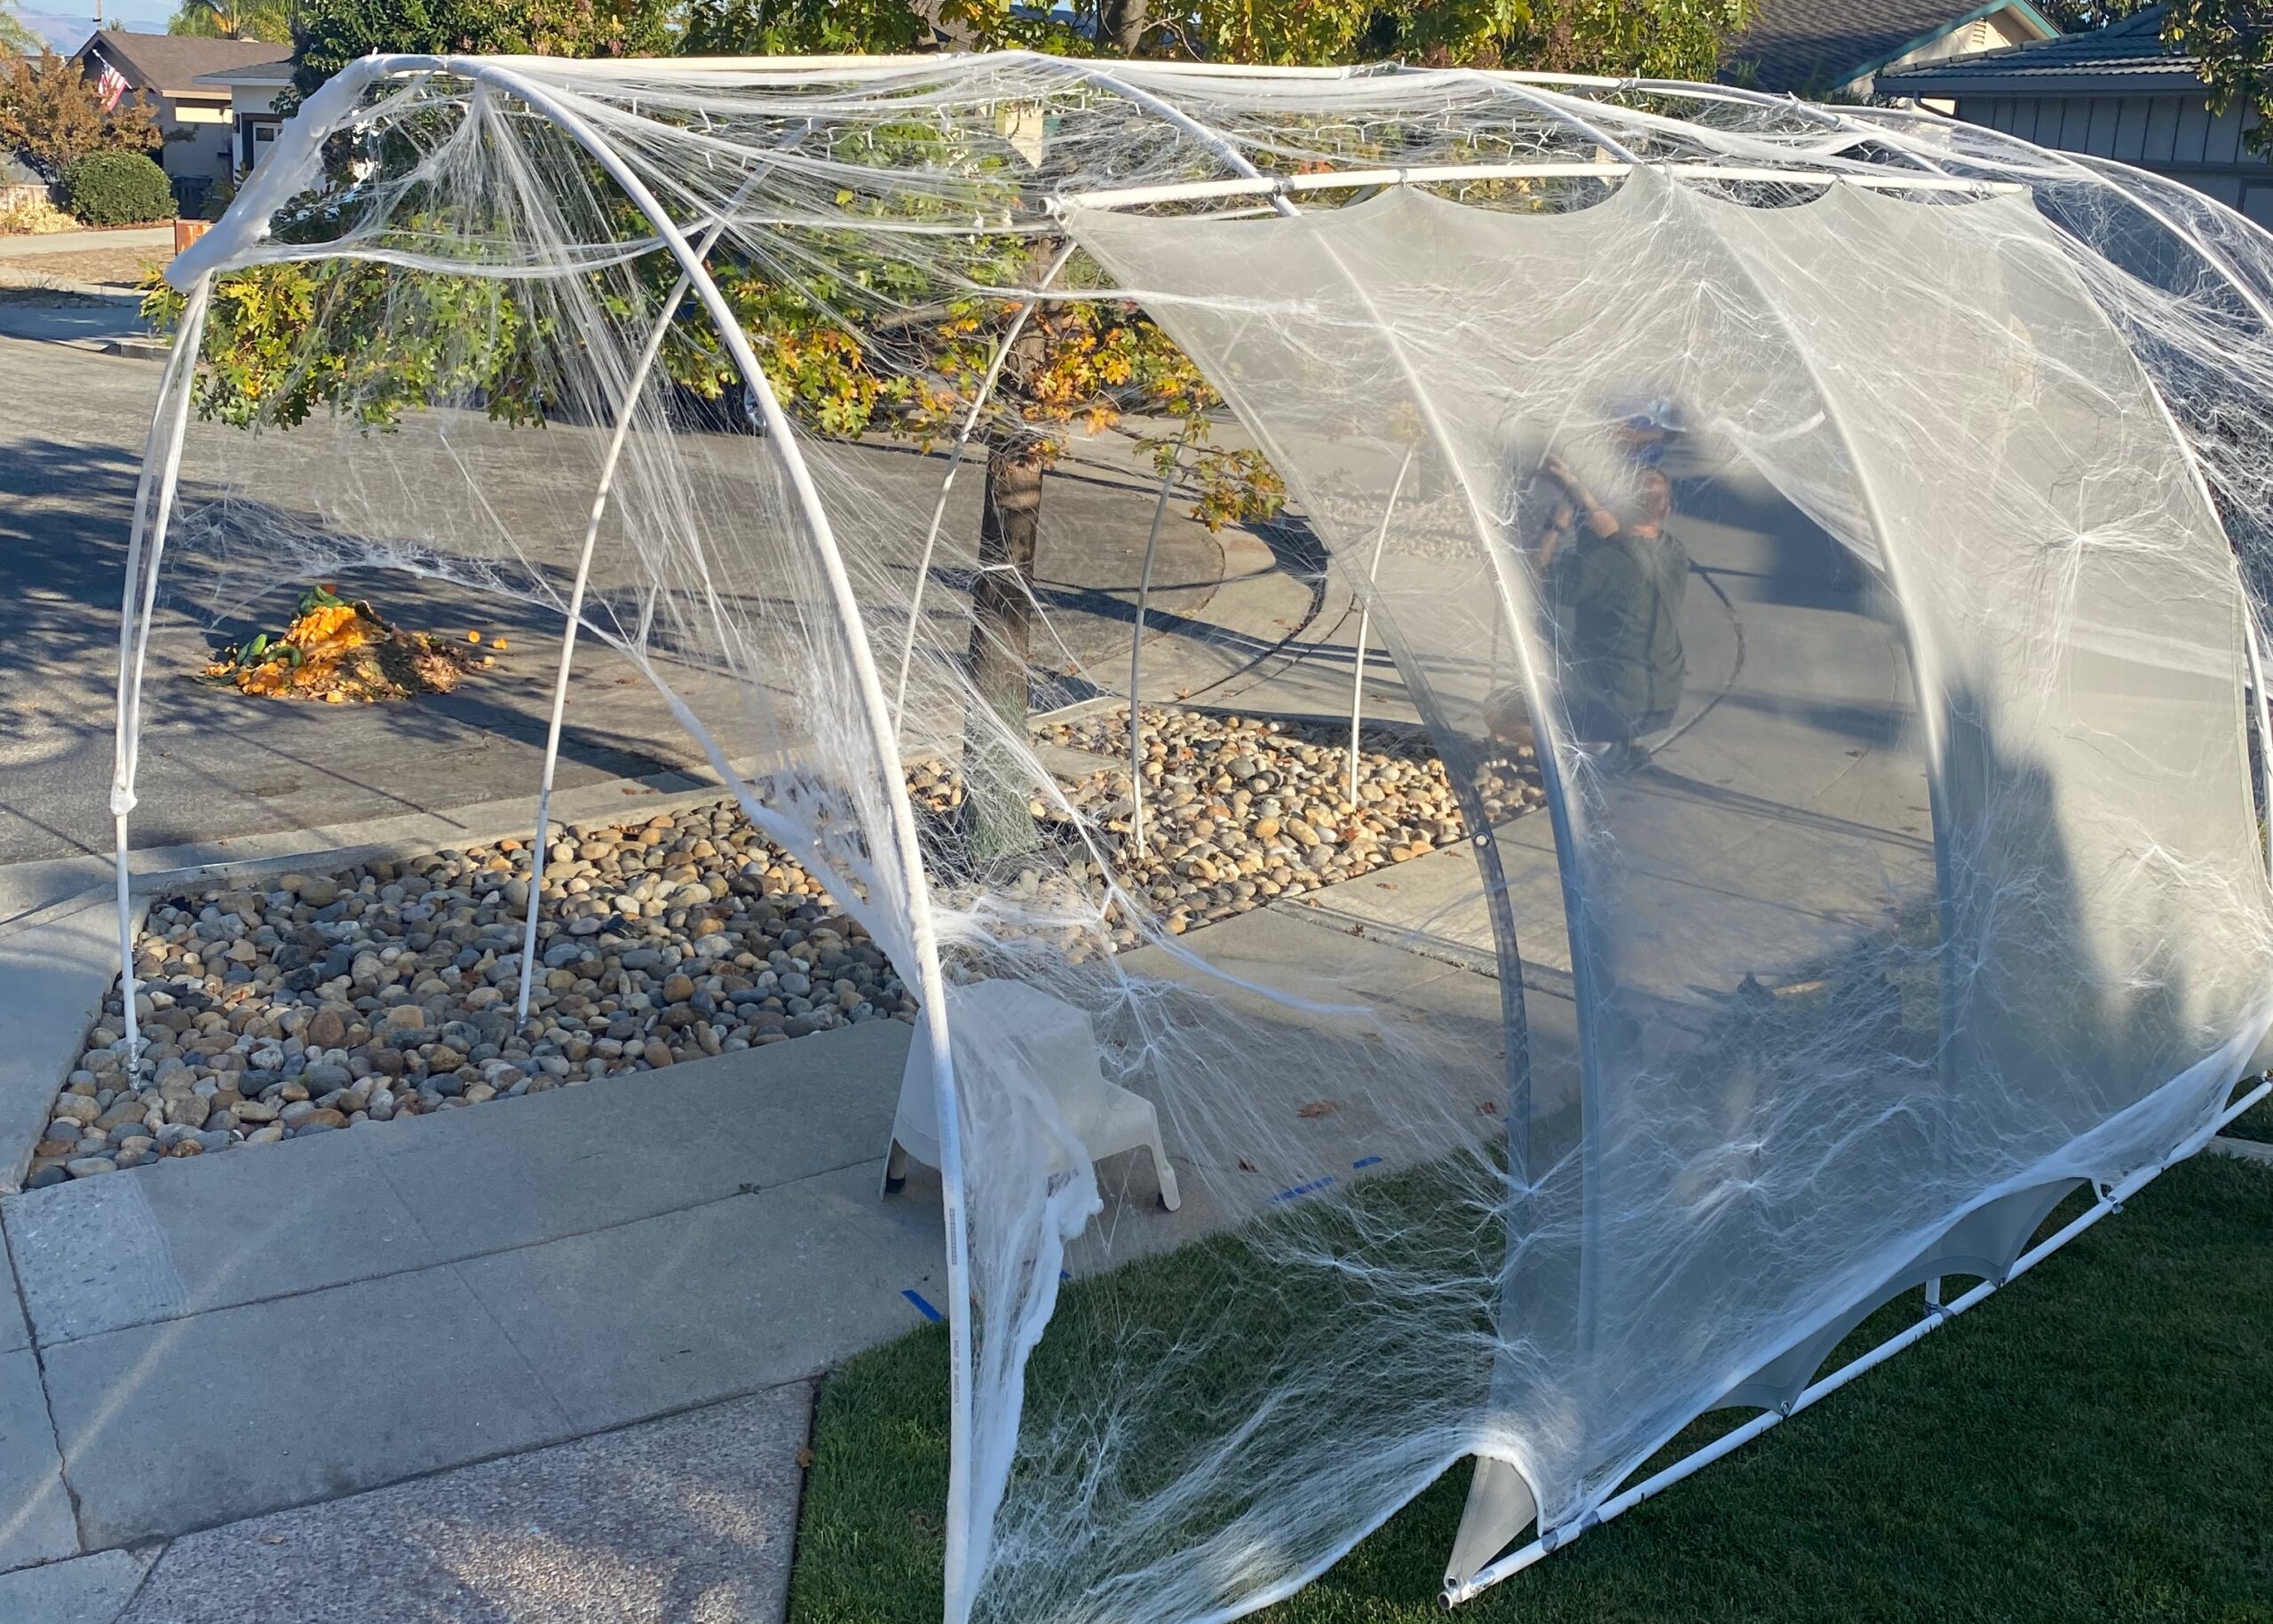
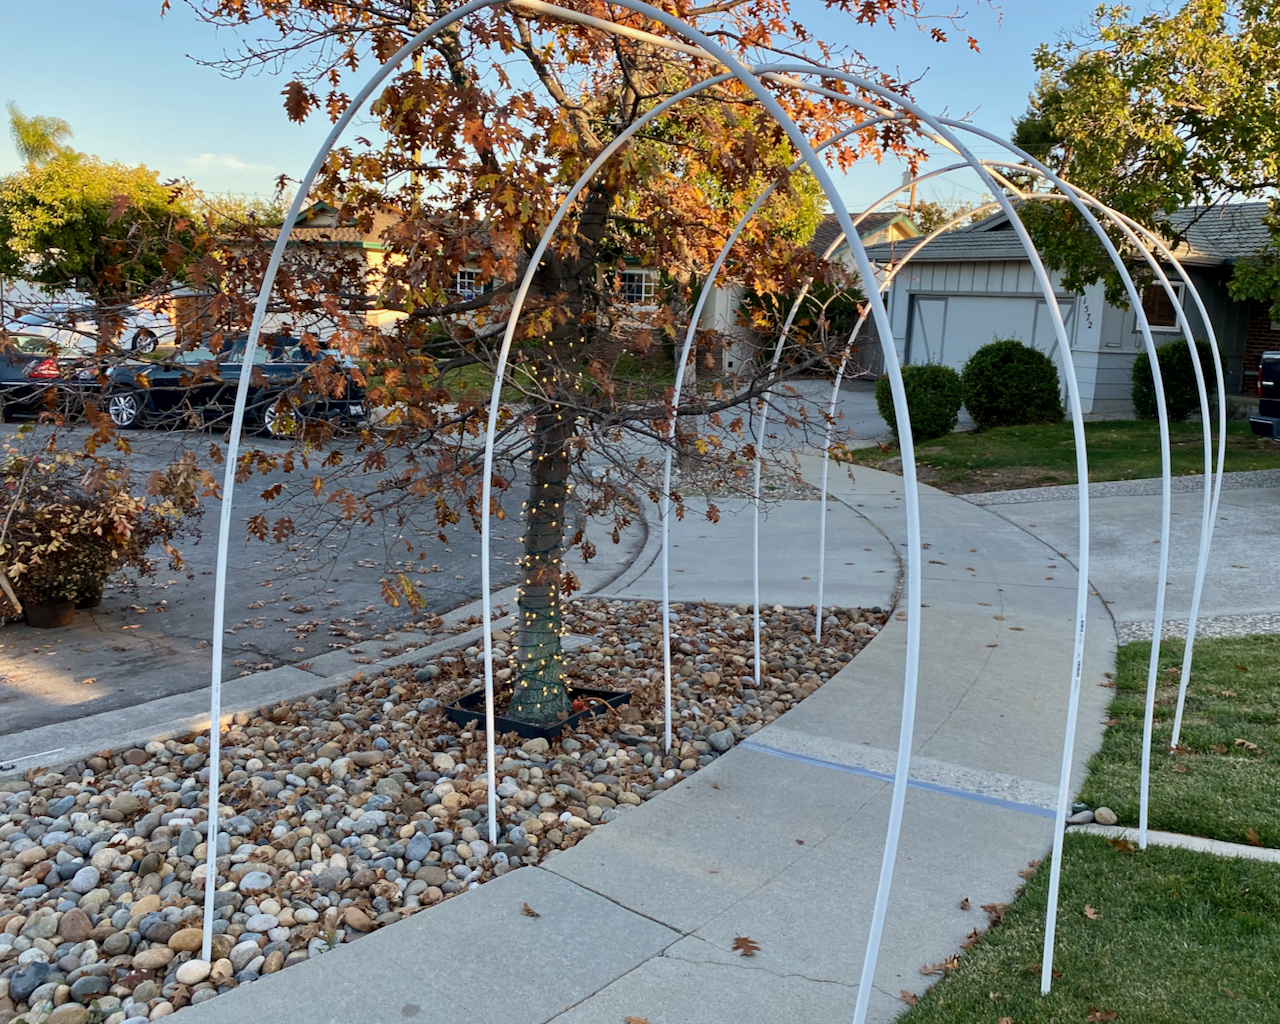
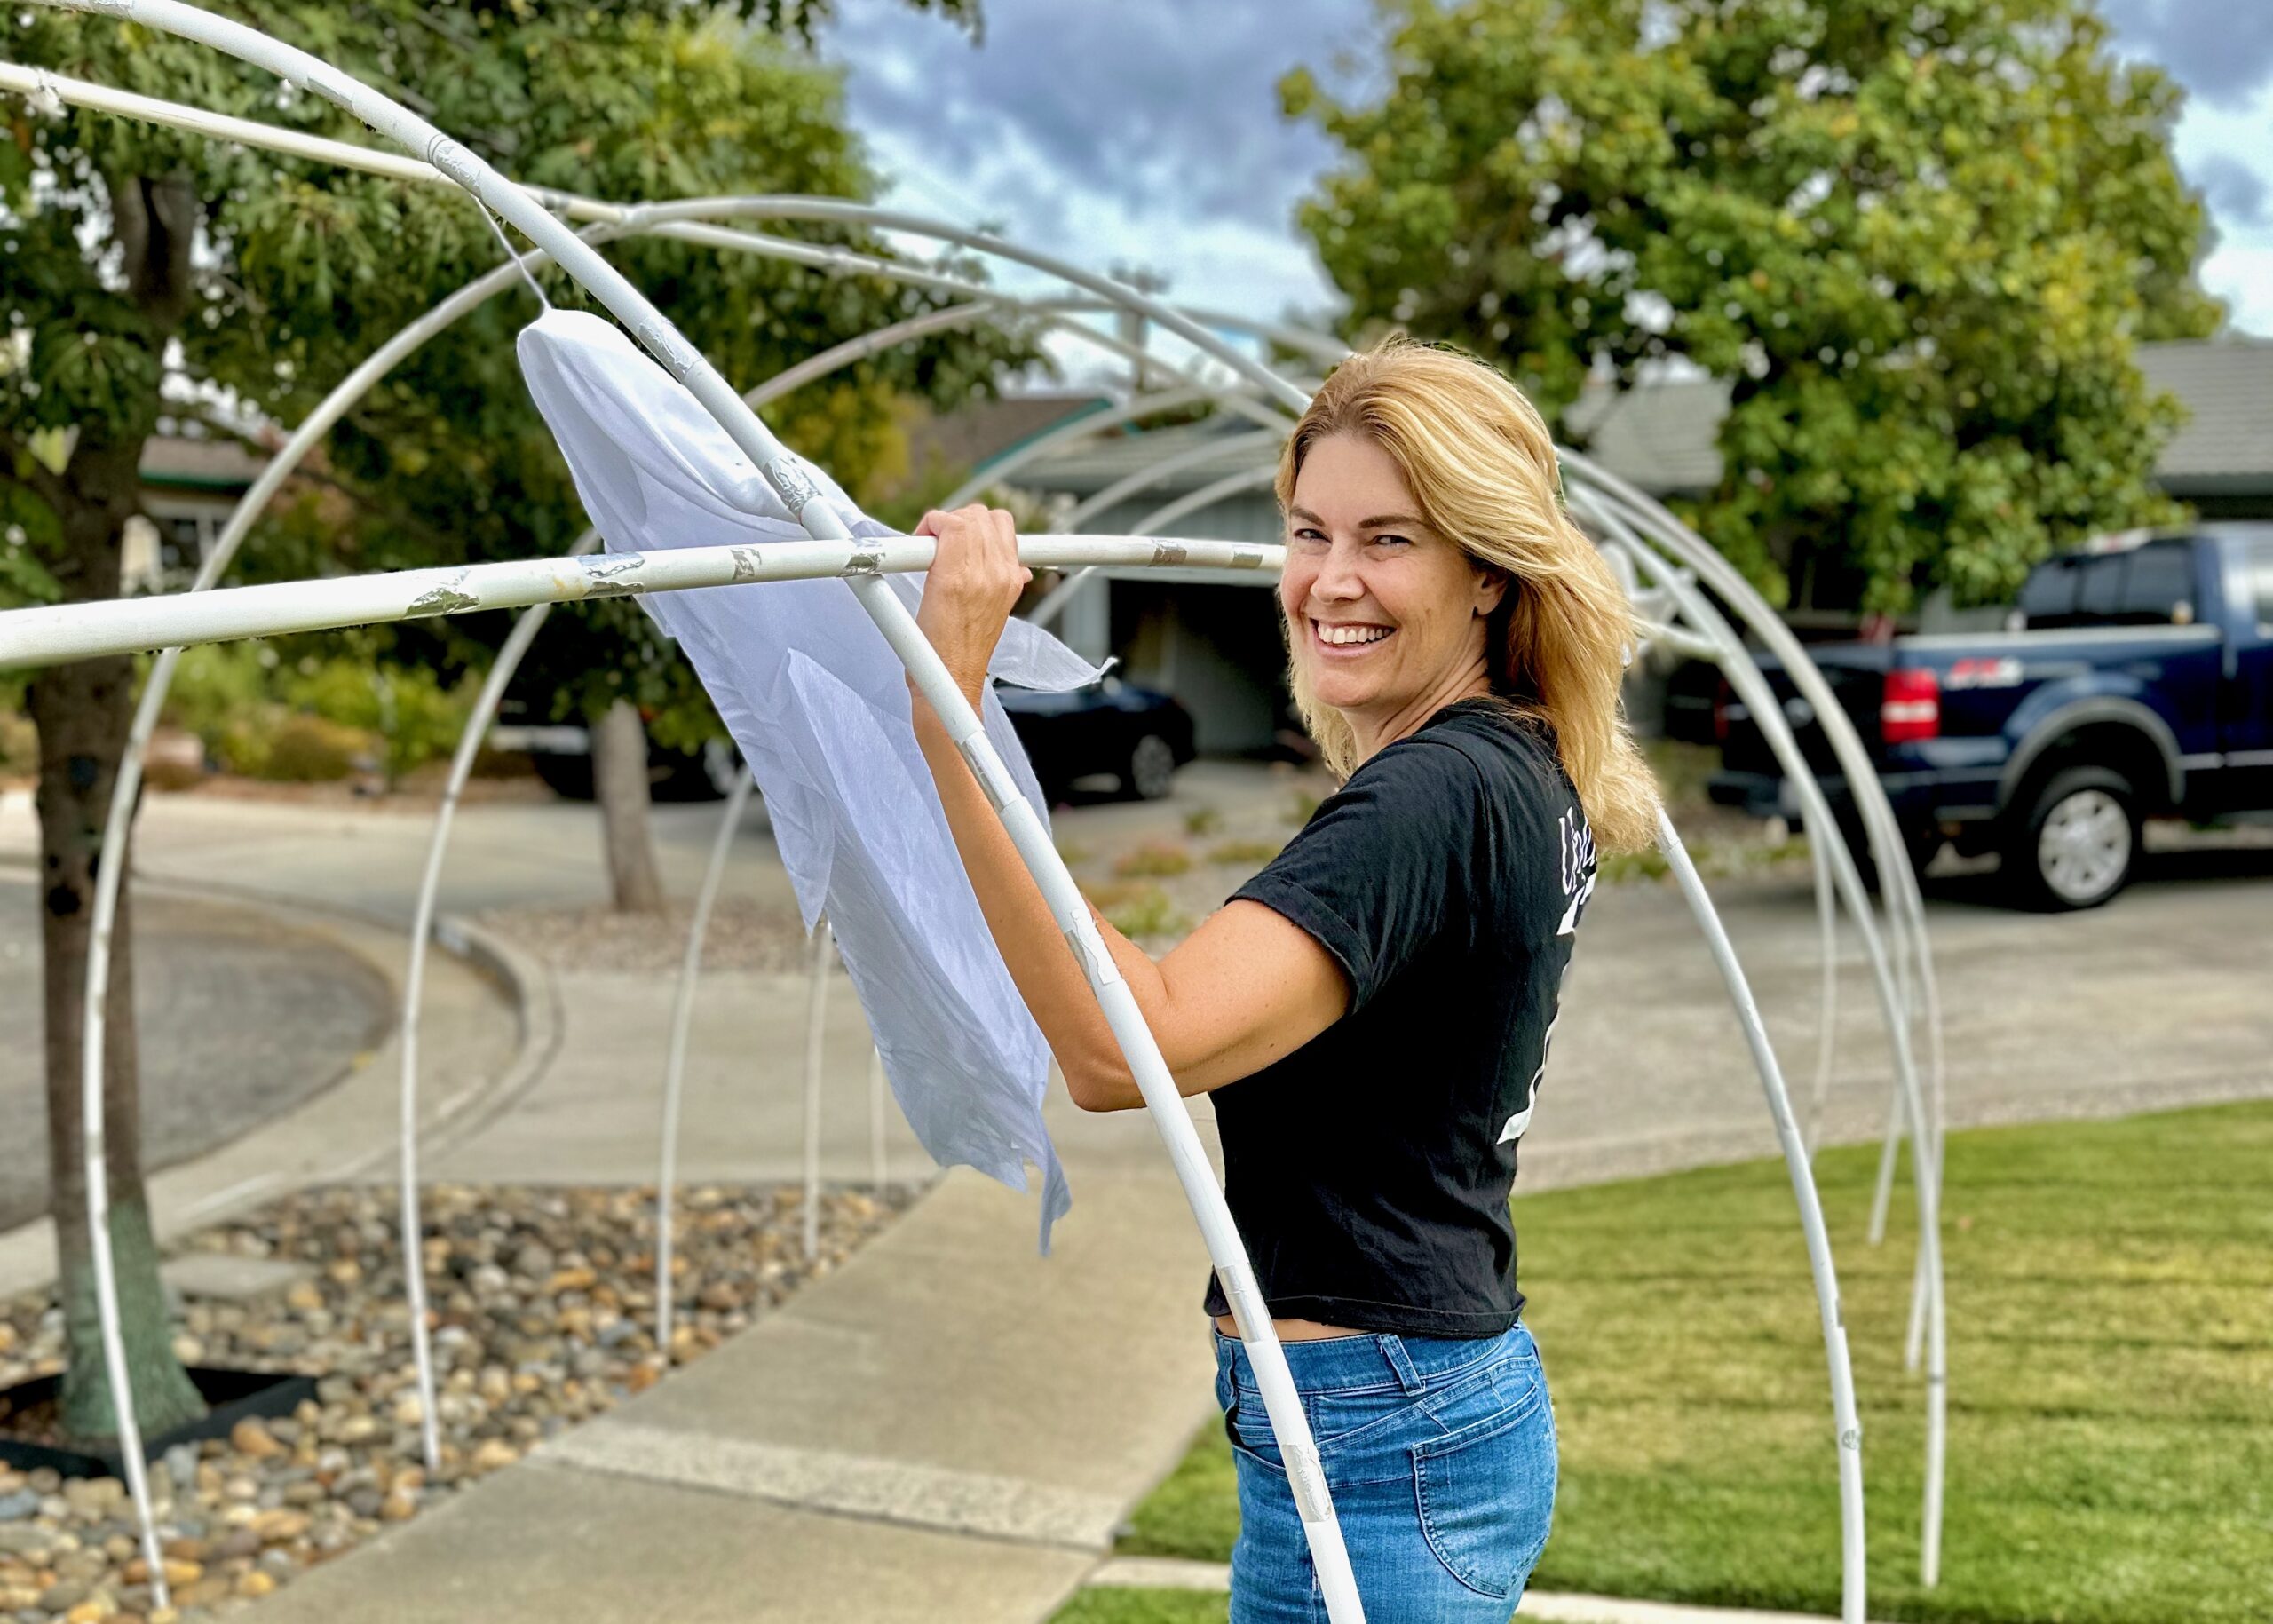
- Putting up the haunted Halloween tunnel is pretty quick and easy. I find it is best to lay things out on the lawn to get things organized. The key is to know where you want them. The arches are about 8 feet wide at the base and peak at about 7.5 feet at the top of the arch. This gives you plenty of room to put them over a sidewalk, path, or wherever you want them knowing that foot traffic under them won’t be an issue. These instructions are for 3 connected arches — but you can add as many as you want
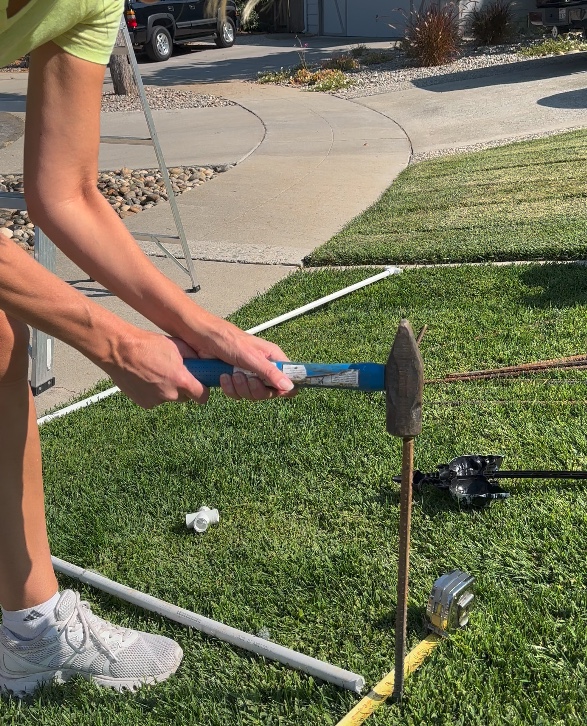
- Using a heavy hammer, pound two of the two-foot length rebar into the ground. You will want to put one on each side of the path about eight feet between them. This will give the arch a good shape. You want to pound them about a foot deep as these will hold the arch up. Adjust the distance between them as you see fit.
- Connect two of the pipes with a “Tee” connector. Make sure you get the pipe seated all the way into the Tee so they stay together well. You will NOT be using any sort of glue. When together you should have a 20-foot pipe. The third port of the Tee will be used to connect the arches.

- With a pal, place one end of the pipe over the first piece of rebar, carefully bending the other side of the pipe towards the second piece of rebar. As you are doing so, ensure the “tee” connector is pointing towards where the next set of arches will be. Your first arch is up… and probably wobbly. We’ll address that shortly.

- Take two more pieces of rebar and hammer them in 5 feet from the first set. For the second arch, repeat the above process; however, instead of using a tee connector use a cross connector. The cross connector will connect the first and last arches to the middle one. You should now have two wobbly arches.
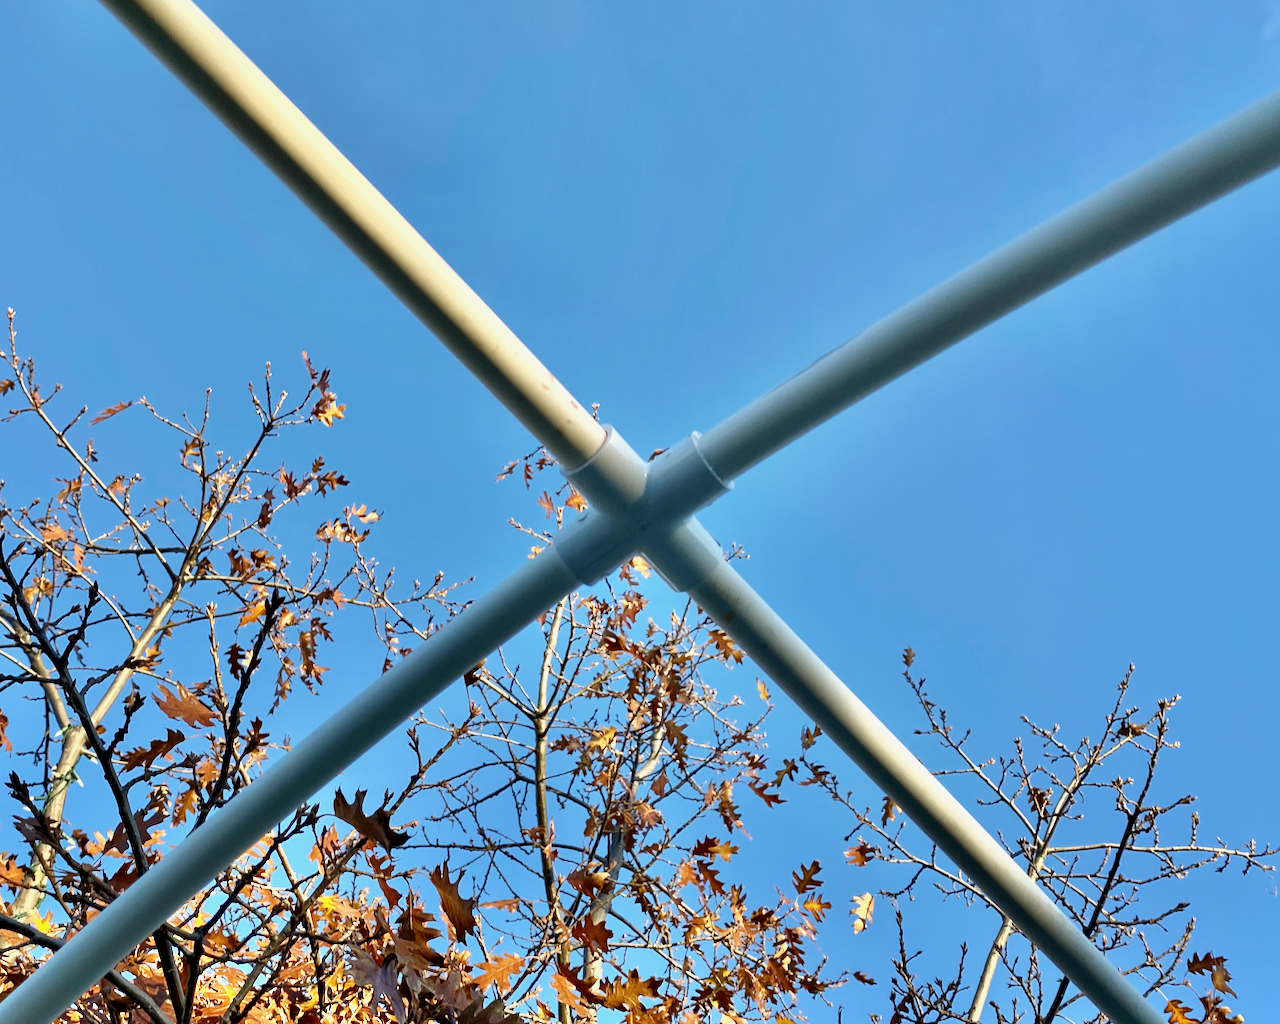
- Take one of your 10-foot pipes and cut it in half… this should give you 2 five-foot pipes. Take one of the five-foot pipes you cut and connect the tee connector and cross connector. Your arches are now less wobbly.
- For the final arch, repeat the above steps… you know the gist at this point. Connect the final arch attaching the tee and the cross with the last five-foot connector. You should now have a completed set of three arches
- This is the point where we start adding our lights and decorations.
Adding the projector screen
- We don’t add the projector screen until Halloween or when we are ready to use the projector. When it’s time, we get out our two extra PVC pipes and attach them to the side. This isn’t some magical process: using duct tape as our fastener, we attach one PVC pipe horizontally towards the top of the arch and one towards the bottom of the arch. The key is to space them so they fit your screen — this will vary depending on the screen mesh you have. Our screen has “eyelets” so we use zip ties to attach our mesh projector screen to these horizontal pipes. We’ve also used binder clips (from our office supplies) to do the job. It’s really that easy. Just remember to measure your screen so you know at what distance you need to place your pipes.
An update:
Videos Projections


Mom of two and seeking sanity in the everyday. Let’s chat about family, school struggles, travel, and living our best life. Located in the San Francisco Bay area.


Join the discussion One Comment